Do You Need a UV Filter for Your Lens

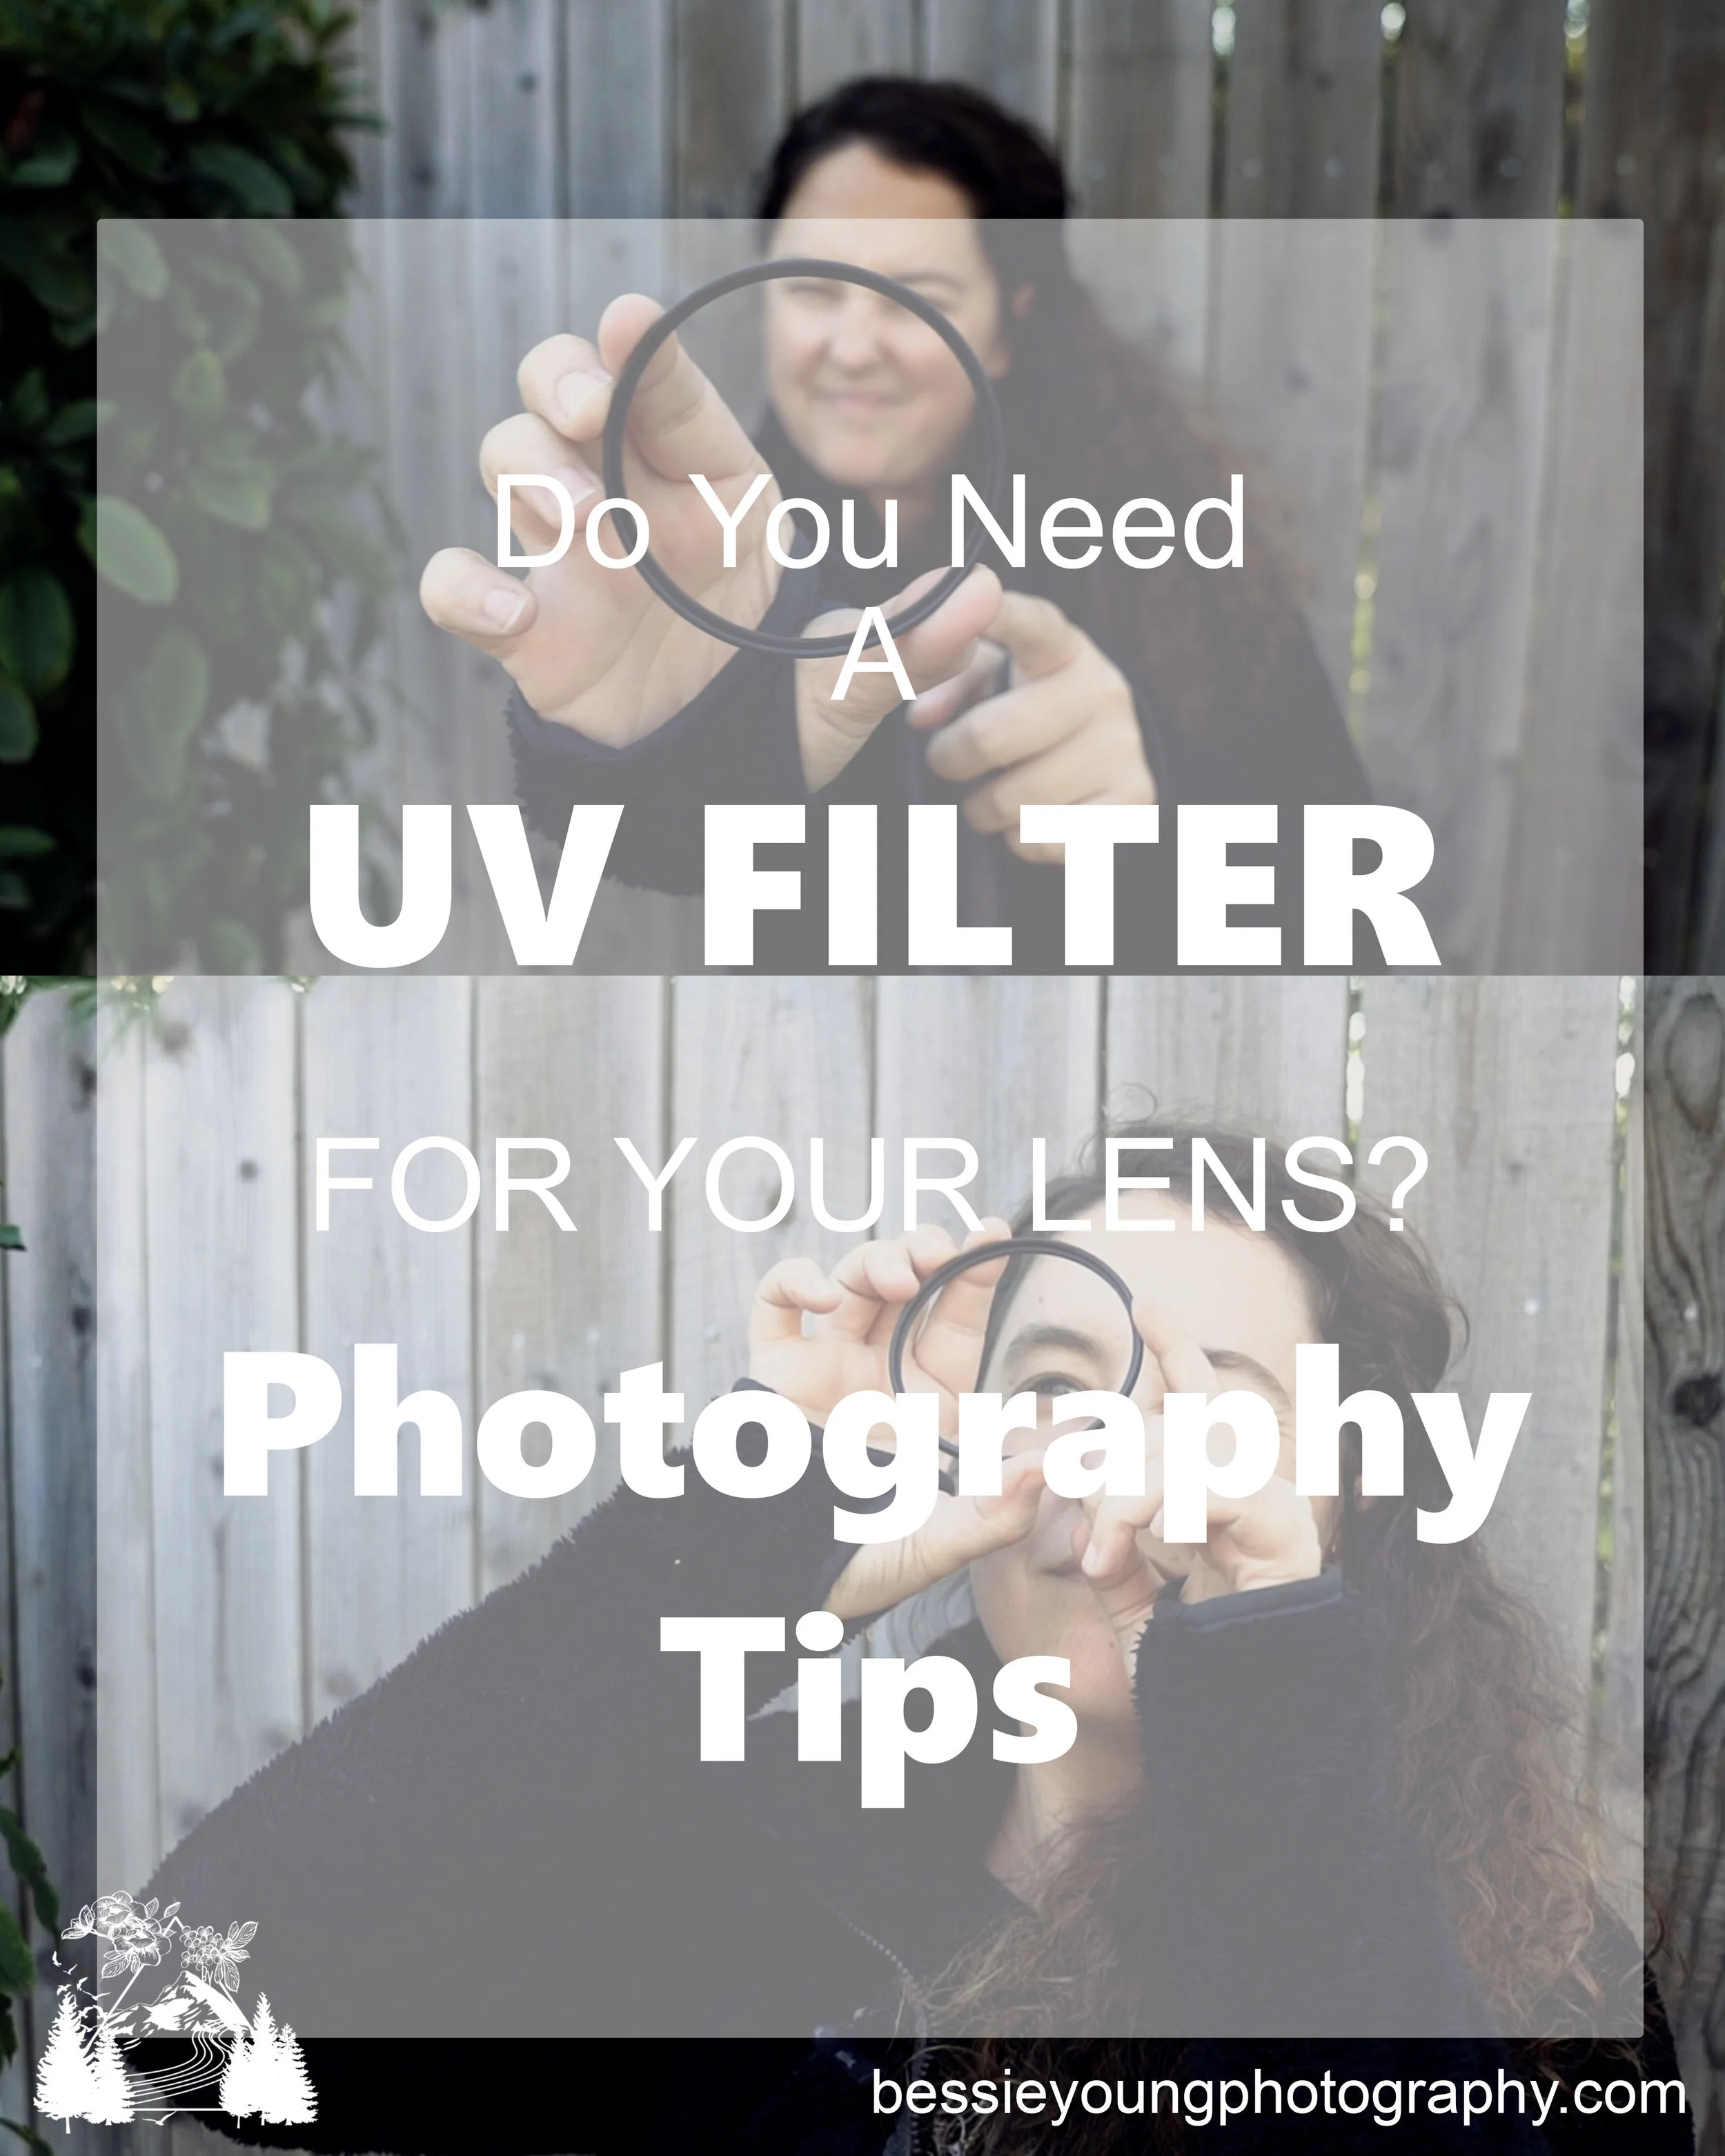
This question has been asked over and over again so I figured it would be a perfect post! Do you need, or should you use, a UV filter on your lens?

This is a very controversial question and one that is mainly based on an opinion. Many photographers will leave the filter on at all times where others do not. Is one right? Well, I think you should decide for yourself.

Before we get into it lets get some basics:

Are you learning Photography? Check out the freebie page to get you started! I have created a bunch of awesome freebies to help you out :)

What is a UV filter?

A UV filter is a glass filter, just like most others, that will attach to your lens. It is meant to block ultra violet light rays. It also removes the blue cast from images taken during a very bright day, or bright sunny conditions.

Do You Need a UV Filter for Your Lens?

Lets bring up the most common arguments, pros vs. cons

Pros for using UV filters all the time:

  • The UV filter provides protection for the lens from damage

    Oh my gosh there is only 1 thing worse than dropping your camera…. picking it up and seeing your lens shattered. I haven’t had this happen to me, thank the lord, however, I have heard horror stories. I have also heard amazing stories as to how the UV filter saved the lens. Now, in my opinion, that is a pretty good investment. I would rather lose a $100 UV filter than lose a $2k lens.

    To play the devils advocate though, if you drop your lens to where your UV filter shatters, wouldn’t that also ruin your lens internally due to the impact?

  • The UV filter keeps my lens clean. No dust, dirt, scratches, finger smudges, and so forth

    This is true too. The UV filter is an extra layer of glass; therefore, it will keep all the dust and grime off of your lens glass. It is also a flat piece of glass which is much easier to clean when needed.

    If the filter does get scratched then it is much nicer to have to buy a $100 filter rather than a $2k lens.

Cons for using UV filters all the time:

  • The filter causes a loss of image quality

    This is true in theory. Yes adding glass to glass can reduce the image quality. But the loss is going to be so small in practice that you need to really ask the question of ‘is the loss of image quality significant and going to effect me?’

  • Loss of light

    I have never seen this. Adding a piece of goo quality glass to your lens, that is clear, should not effect the amount of light that enters your sensor.

  • Loss of resolution

    As long as you are using a good quality UV filter you will not see any significance in the quality on a normal lens. A good quality filter will have optically flat surfaces and should not disturb the direction of the light that will pass through the filter.


Do You Need a UV Filter for Your Lens Photography Tips and Tricks by Bessie Young Photography youtube.jpg

In Conclusion

Ultimately, I do keep a UV filter on my lens, but the choice is really up to you. Again, you need to choose if the ‘loss of image quality is significant’ to you.

I do need to warn you though… if you put a cheap filter on your lens and in front of your expensive glass you are ultimately creating a lens with the image quality of that cheap filter. Do not buy a cheap filter. Basically all I have to say is :

Cheap low quality filters are NOT acceptable.

Filters are not the funnest thing to buy, lets just be honest; however, they are important, keep you creative, and can be incredibly helpful. Make sure to get yourself a good quality UV filter. Expect to spend in the $100 range when purchasing a good quality UV filter.

I got my filter from Horn Photo and love it. I have not seen any negative effects to my image quality with it. If you can go to Horn, then make sure to do so. They are an amazing company and local small business. If you cannot go there, then I would check out the Zeiss, the Heliopan , or the Hoya .

Do you use a UV filter? Comment below and let me know. This blog is meant to be a community helping each other out, growing our businesses, growing our knowledge, and so much more. We are seriously so much stronger together!

Bessie


Super Blood Wolf Moon Landscape Photography

I have the absolute best people in my life. My sister and her husband originally told me about this natural phenomenon. Then, a couple weeks later a couple of good friends asked me if I heard about it. Finally, a few days before the occurrence, my mom sent me a text telling me about it. Seriously though? How cool is that? I have such an amazing support system for my photography. Whenever something cool is happening, I know that I will hear about it one way or another.

Super Blood Wolf Moon Landscape Photography by Bessie Young Photography.jpg

The Planning

When my sister told me about it, obviously I began researching it. When is it? What is it? Where to see it? I mean all the things 😊 If you want to learn a bit more about all the details make sure to check out my recent post on ‘How to Photograph the Super Blood Wolf Moon’. This blog will give you probably a bit more information than you were expecting about this awesome show that the moon put on.

My original plan was to head out into the foothills of my hometown to get some pretty images; however, that plan got thwarted when the weather called for rain. I’m not talking a slight drizzle either. I’m talking about a down pour. As I started to search for places to go and check the weather, it seemed like the majority of the State of California was going to be cloudy during the Super Blood Wolf Moon. Northern California was calling for thunderstorms and Southern California was calling for full cloud coverage. So, I got a little discouraged and figured I wasn’t going to be able to see it. Then I found the spot! The spot that might have a potential to be partially clear during the Super Blood Wolf Moon…. Lone Pine and the Alabama Hills.

The Adventure

The question was, do I want to spend all the time, money, and effort to head over to the Alabama hills with pretty good odds not to see it? Well, I’m somewhat of a gambling girl, so I hopped in the car on Sunday to go and take my chances.

The drive to Alabama Hills is about 5 hours from my town. Not too terrible, but leaving on a whim left me in a little bit of a hurry. The moon was supposed to rise around 5:30pm and I left at 11:30. The eclipse wasn’t supposed to happen until 8pm or so; however, I really wanted to get an image of the Super Moon coming up over the mountain tops.

I rolled into Alabama Hills about 4:30. PERFECT Timing let me tell you. I was super stoked because I also got to get some amazing sunset images. I mean seriously though, I took way too many sunset pictures. The clouds kept changing and things just were getting better and better. It was absolutely gorgeous. I wish I could share all the images with you.

Alabama Hills California Sunset - Fine Art Photography by Bessie Young Photography
Rising Super Blood Wolf Moon January 2019 by Bessie Young Photography Landscape Photography

Actually, I got so caught up in taking sunset images, I didn’t leave much time to set up for the moon rise. Luckily, I was able to get both sunset and moon rise! YAS!

The sky was partially cloudy, which made for some amazing sunset pictures, but it sure made me nervous for the moon. I wasn’t sure if I was going to be able to see it at all.

Since the Blood Moon wasn’t supposed to begin until around 8pm, I had plenty of time to go grab some dinner. After dinner I headed back out. Let me tell you friends, it was freaking windy and cold. Like cold, cold cold. I had my down jacket on, a beanie, and hand warmers, and man it was cold.

Rising Super Blood Wolf Moon January 2019 by Bessie Young Photography

Getting the Shot: The Super Blood Wolf Moon

Super+Blood+Wolf+Moon+Landscape+Photography+by+Bessie+Young

As I sat in my car, I looked up at the sky to only see clouds. You could see portions of the clouds lit up due to the brightness of the moon, but no moon! I sat there for a bit with the moon peaking out and then hiding behind the clouds. It played this game for almost an hour. As it started to peak out, I noticed that the eclipse had stated.

Well I guess I am not going to get the shot after all

The most frustrating part of this whole thing was that the clear sky was just at the edge of the moon. Yas, it was inches away from being visible. How frustrating is that?!

So, I figured, I would get all my stuff set up just in case. I opened my door, and the wind almost tore it off. To the East was the clouds and the eclipse occurring right before my very own eyes, being hidden by the clouds. To the West there was a lightening storm. Where I stood was open skies with the wind whirling around me.

Super Blood Wolf Moon Landscape Photography January 2019 by Bessie Young Photography

As I set up my tripod, in the dark, the wind wanted to blow the entire set up over. I tried to get a few shots of the moon with the cloud cover and was completely unsuccessful. Eventually, I moved the car to block the wind. I sat there… waiting….

I could see the moon beginning to turn red, but the cloud cover was just barely too much that all my images were turning out blurry. All of them were blurry!!! I got a couple mediocre shots and the moon went completely behind the clouds for what seemed like forever. It was over, I was packing up. No reason to sit and stare at the night sky hoping for something to happen.

I packed up all my things and sat in my car. Checked my phone, and just tried to get a bit warm. Then, out of no where, the MOON!!!! The full blown MOON!!!! I scrambled, cursed a little, and then jumped out of my car, set my equipment back up and BOOM! I FREAKING GOT THE SHOT!

It was awesome and I am so dang thankful that I didn’t drive away when I was thinking about driving away!

Super Blood Wolf Moon Landscape Photography January 2019 by Bessie Young Photography

What Were My Settings for the Moon Images?

I played around quite a bit with my settings and eventually settled on

Shutter Speed: 1 second

ISO: 2000

Aperture: 5.6

I hope you all enjoyed this blog. Were you able to see the Super Blood Wolf Moon? Did you photograph it? If so leave a comment below . I would love to hear about your trip!

Wishing you nothing but amazing adventures and pretty pictures!

Bessie


P.s. Did you like this blog? Check out these ones as well:

The Creative Process | Inspiration for Creative Entrepreneurs | Car Chats With Bessie

Ahhh, being a creative… We have so many different ups and downs. The creative process is tricky, but it is only tricky when it comes to your mind. We play so many mind games on ourselves it is crazy.

There are a ton of different funny quotes about the creative process. You can find all sorts of images that can make you laugh and that you can completely relate to. I just figured, I would create one myself, explain what actually goes on in our heads, and then share it with you! So here goes nothing. I hope you enjoy, get a good laugh, and can relate to it all :)

pin it button by Bessie Young .jpg

The Creative Process | Inspiration for Creative Entrepreneurs

Car Chats With Bessie

The creative process Inspiration for Creavite Entrepreneurs by Bessie Young Photography

So here is my version of the creative process:

  1. Yas! This is awesome!

    This is the beginning of it all. We get inspired, have an awesome idea in our head, and are freaking gung ho to make it come to life.

    At this point we gather all the supplies, all the things, maybe some coffee along the way, and then get to creating.

  2. This is hard…

    As we start ‘making it happen’ it becomes apparent that the idea is way harder to make come to life than we expected. We begin to question ourselves. Like

    • “What the hell was I even thinking starting this project?”

    • “This seemed so much easier in my head”

    • “Why the crap do I do this to myself”

    • “What is wrong with me? Why isn’t this easier?”

  3. This sucks!

    After we get to creating, realize how hard it actually is, and start seeing the product actually come to life all hell breaks loose. Everything gets questioned. We begin to doubt ourself because things may not be going as planned. We get uninspired, sad, and we start all the negative talk…

  4. I suck! I should quit.

    Yep, all the negative self talk one can, or can’t, handle. This is in the heart of the project. Where we begin to want to give up. Where we question everything and when I say everything I mean everything. We even begin to question life choices that aren’t even related to the project itself.

    This is where we then also start to compare ourselves to others.

    • “Why do I even try, look how good they are doing”

    • “What is wrong with me?”

    • “Oh crap I can’t ever find anything around here. I really need to get better at being organized.”

    • “I definitely shouldn’t have had all those drinks during New Years”

    • “Why can’t I ever finish a new years resolution? Oh ya, because I suck!”

    • “I suck. People are just lying when they say they like my stuff”

  5. This might be ok…

    After kicking our own ass, possibly for days, we start to see the final product. We start to realize that there might be some hope. That there is a possibility that the project might turn out just ok. Maybe not great. Maybe not what we expected it to be, but good enough.

    • “Huh…. maybe it’s not that bad”

    • “Maybe it will turn out ok. I guess I will finish it just to see the final product complete, but I won’t share it with anyone”

  6. Yas! This is awesome!

    The project is complete. This phase might take a few days to actually make it to. We might be stuck in phase 4 or 5 for days. When I say days, I mean freaking days. Not like seconds, or minutes, or hours…. DAYS.

    We inspect the project, look at it over and over again, talk to our Mom about all the good and bad aspects of it. You know… why it sucks and why it might be ok. What all the flaws are about the final product. What might make it a pretty cool accomplishment.

    We then walk away. Sleep on it. Inspect it again. Eventually we realize how awesome it really is and we get the courage up to share it with others.

So there you have it. The creative process. The funny, somewhat ridiculous, and oh so very real things we go through on a day to day basis. Being a creative definitely has its ups and downs. It can get crazy, but I wouldn’t have it any other way. I love being a creative, being able to have a vision of something and make it come to life :)

Can you relate? Leave a comment below! I would love to hear your version of one of the phases, or your version of the entire creative process :)

Wishing you nothing but the most positive 2019!

Bessie

How to Photograph the Super Blood Wolf Moon January 2019 | How to see it in California

It’s tonight! The Super Blood Wolf Moon Lunar Eclipse is happening and the sky is going to be putting on a pretty darn awesome show. I am sure even just hearing the name you are interested, but what is it and how do you see it? Here is everything you will need to know about this phenomenon :

Super Blood Wolf Moon January 2019 | How to see it in California

When is the Super Blood Wolf Moon?

Sunday January 20th into Monday January 21st, 2019 (depending on where you are located in the USA)

The Lunar Eclipse will begin around 11:30 ET which means about 8L30 Pacific time.

You will want to start watching the sky around 7:30pm. if you are in California. As the Earths shadow begins passing in from the lower left. Totality will be around 8:40 and the moon will return to its normal appearance around 9:40pm.

What is the Super Blood Wolf Moon?

This term is being used because there are several events happening all at once. It sure is a mouthful but lets break it down a little.

Super Moon: A super moon occurs when the full moon is at its closest point to the earth.

Wolf Moon: Every month has special names to describe the full moon. For January it is Wolf Moon. It originates from the Native American folklore.

Blood Moon: This is going to be the coolest part of the show. This is the lunar eclipse where the moon will turn a blood red color as it passes the Earths shadow.

How to see it:

accuweather.brightspotcdn.com.jpg

You will need to be outside, during the right hours, with clear open skies. If it is cloudy, which is what the California weather is calling for, you unfortunately will not be able to see it.

Most of the US will have the ability to see the Super Blood Wolf Moon this January. You will not need any special equipment to see it. Just your own two eyes.

How to photograph it:

You will need a variety of things…

Super blood wolf moon January 2019 | How to see it in california by Bessie Young Photography
  1. Plan out your location - scout it out to find the best composition

    • Decide if you want a large landscape shot, or just the moon shot. This will determine your lens.

  2. Make sure it is clear skies

  3. Be at your location well before the occurrence

  4. Tripod

  5. Camera

  6. 100-400+ mm lens

    • This will be more for just a moon image. If you want more of a landscape you will use a 70-200mm lens

  7. Head lamp

  8. Camera remoted

  9. Warm clothes to make sure you are comfy and warm. This way you are having fun rather than miserable and only thinking about how cold your toes are :)

  10. Snacks and drinks to make sure you are comfortable and enjoying the show

That’s it! Now get out there and freaking get some amazing moon images! Are you going out to see the show? Comment below and let me know where you will be viewing it from, what kind of gear you plan on using, and all the deets!

I can’t wait to see your photos!!

Bessie

Things You Need to Do During Your Off Season

Alright fellow photographers, creatives, and entrepreneurs… there is one thing that you are going to have to accept…. Entrepreneurship is seasonal. Once you accept that the better you will be. Business will get slow, and then it will speed up. It will really really speed up to where you feel like you are spinning, and then it will slow down to a snails pace leaving you questioning if everything is ok.

Everything is ok. This business of ours is just seasonal. Try to be ok with that and you will feel a lot better. Plus, once you are ok with that you will be able to really take advantage of your down time.

Let me give you a little story of where I am coming from. At the beginning of last year, I was so slow that I began to worry. Ok, worry is an understatement but you get where I am going. I sat there sad, kinda depressed, and ultimately worthless.  During the summer, especially the late summer, things got crazy. I was staying up late, getting up early, and I even started to drink an energy drink here and there which I don’t ever do.

I honestly wondered if I could keep up with it. I was also super worried because I didn’t have the time to blog. My blog fell completely off the radar. I mean it was so far gone it wasn’t even funny. Months went by without me blogging and that little voice inside my head wouldn’t leave me alone. It was telling me I wasn’t good enough, I needed to do more, blah blah blah.

If I would have just been ok with the idea that this business is seasonal then I could have accomplished sooooo much during my off season to where I felt amazing during my busy season. So here are some things that you just need to do during your down times in order to not get overwhelmed, frustrated, depressed, and just plain overworked during your busy times:

Things You Need to Do During Your Off Season by Bessie Young Photography

Things You Need to Do During Your Off Season

Update your portfolio

I mean this one in 2 different ways. The first way being, now is the perfect time to schedule some styled shoots! You have a bunch of free time so why not make the most of it. Do something for you. Create a shoot that you have been dreaming of. Let your creativity flow. This isn’t only good for your mind, and your soul, it is good for your portfolio. Show people what you are capable of.

Secondly, update your portfolio on your website. Show your favorite images. Your best images. Not all the images. You want to attract your people, your tribe. Update your portfolio to resemble who you want to attract.

Network!

There really is no better time to get together with other creatives, other entrepreneurs, and other like minded people. I don’t mean this to mean reach out to people to make money. I mean actually network with people. I mean talk to them. Be friends with them. Help them. Give them your gifts. This is huuugggeee in growing your business in the long run.

Learn

As small businesses we tend to not invest in ourselves. This is terrible because honestly that is really the best place to put your money. I think learning from others is such an important thing. This is how we grow as individuals. You have to spend money to make money friends. This is the perfect time to sign up for a workshop, schedule a mentorship,

Start a personal project and learn by being creative and playing.

It takes a lot of effort to get your business moving forward and to keep it moving forward. We have to stay current, up to date on all the things, and just “in the know” (no I’m not cool enough to say that, but I said it anyways).

Devise a Plan and Schedule

This is where I went wrong last year during my down time. I freaked out and just didn’t do anything, but I could have been planning all the things. So my thoughts here are start planning your posts. I mean all the posts… Pinterest, social media, blog posts.  

This is really where you are going to help yourself during your busy season. You can schedule posts. This way when you are busy, you don’t have to worry about blogging, or pinning, because guess what? It is already completed for you. You did it during your down time! How awesome is that really though?

So, devise a plan for your blogs. Create the blogs, and then schedule them out throughout the year. Now you have content for half the year, or maybe even the entire year, or at least until your next down time.

Enhance Your Brand

During the slow season you can really take a fine look at your business. You can see it from every perspective.

Have a real honest conversation with yourself and how your brand looks. Is it cohesive throughout all the things ie social media, websites, emails, newsletters, etc?

Can you simplify anything for your customers to make things smoother?

Does your brand attract your tribe? Does it attract your target market?

Work on your website

This goes along with the above ‘enhance your brand’.

We always put off working on our website. It is one of the last things we creatives want to even think about, but it is freaking important friends! Does your website resemble your brand? Does it attract your target market? Is it easy to navigate? And be honest, how old are the photos on your website?

I hope this blog was helpful and just got you thinking about how you can really take advantage of the down time. Also, hopefully it will help you not fret when those slow times do come around, because believe me they will come whether you try to avoid them or not.

Honestly though, the slow times are one of the best times for your business. They are the times where you can really nurture your business back to health. These are the times that you can make everything shiney again. Embrace the slow times, appreciate them, love them, and be ok with working on all the other things that we didn’t realize came with running a business J

Wishing you the very best!

Bessie


P.s. Love this post? Check out these similar ones:

How To Print Photos From Your Phone - Print on Location

How To Print Photos From Your Phone - Print on Location

How To Print Photos From Your Phone - Print on Location by Bessie Young Photography

I am a HUUUGGEEEE believer of printing your images. Yes, I think it’s crazy important. In todays world, everyone thinks that me most important thing to have is digital images. Well I do believe those are important printing your images is just as important. You need to hold your images in your hands, hang them on your walls, put them in photo albums, share them with friends, and just do all the things with them.

As you guys know I do both Landscape photography and Portrait photography. I love love love to spoil my customers, I love to be able to hand an image to someone and see their expression, and I just love printing pictures lol. (how many times can I say that?! So, I have been on the search to print images on location.

I figured it would be the coolest thing to be at a portrait session or a wedding and be able to hand a printed image to my people. We are so used to getting things right now, and I want to be able to provide that kind of service.

I also wanted to be able to be at a family party and hand a print over to my sisters after a silly selfie :O

So, the search began and I found the coolest little printer you ever did see!!! It is called the

Polaroid Zip

How to print photos from your phone instantly - print on location by Bessie Young Photography.jpg

There are so many things I love about this little printer.

  1. It is small which is perfect for packing around while you are on a shoot, or just putting in your purse while you are at a party

  2. It is easy to use! All you need to do is download the app and boom!

  3. The battery lasts a long time

  4. The printer prints quickly

  5. The picture size is awesome. Perfect for wallets!

Now, with the pro’s always comes the cons. So here are the things I don’t like:

  1. Only holds 10 sheets of paper

  2. The color is off

  3. The quality isn’t that great

Now, the con’s really aren’t that bad because I only print in black and white. If I am going to print a photo for my clients I do not want to print it in color because then they might get the idea that their images will look like what is printed. If you print black and white, they get the picture, the immediate satisfaction, and great customer service. They walk away smiling and super excited to see the rest. Not to mention it places a small little thought in their head that prints are awesome!

There is also a bunch of other super cool printers that are incredibly similar. So check out these tiny little printers:

Are you learning Photography? Check out the freebie page to get you started! I have created a bunch of awesome freebies to help you out :)

I hope you guys enjoyed this little post :)

If you want to see more gear make sure to head on over to my gear lists!

Wishing you the very best and super pretty pictures!

Bessie

Photography Jargon for Beginners- What do all those words mean?

Photography Jargon for Beginners

What do all those words mean?

Ok, so you are just getting into photography and your head is swimming because of all the ‘photography words’ like aperture, shutter speed, stopping down, and so forth.

Don’t worry friend, I have been there and done that! Seriously, it can take a long time to figure it all out and what the heck everything actually means. That is why I created this Free Instant download photography cheat sheet just for you! It has 9 of the most common photography words and what their meaning is. YAS!

No more guessing, or researching, no more googling. Now you can have the information in one easy to download guide that you can print out or keep on your phone :) How cool is that?

Are you just starting out in photography? Well welcome to the tribe! I am so excited for you and have made a couple awesome things to help you along your photography adventure:

Let me know what questions you have by leaving me a comment below :)

Bessie


P.s. If you are learning photography and love posts like this then make sure to check out these ones :)

Unboxing the Ronin S Gimbal Stabilizer for DSLR or Full Frames

Unboxing the Ronin S Gimbal Stabilizer

for DSLR or Full Frames

Unboxing the Ronin S Gimbal Stabilizer for DSLR or Full Frames

I finally did it! I finally bought a gimbal! I couldn’t decide which gimbal to buy, because honestly there are just so many freaking options. One day I was watching a Peter McKinnon video all about this amazing gimbal. Honestly that video couldn’t have come at a better time! I was struggling with making a decision on which one to purchase, but after that video I was sold! I hoped on amazing and Boom! Gimbal bought!

Alright, so what is the reason for this Ronin S Gimbal? Why would I buy it you ask? Well, as you all know I have been slowly learning how to take video, and slowly throughout this year I have been up-ing my video game. I started my youtube channel with nothing but my cell phone. I then upgraded to my cell phone and a selfie stick.

This year, I decided I really needed to do better. I mean better and prettier videos. I want the videos to be informative as well as entertaining and beautiful to watch. So, on and off all year I was combining using my Sony A7riii, my Sony 6500, and my cell phone for my videos. I used what ever worked best at the time of the video. Since starting to use my camera, I have noticed a HUUUUGGGGGEEEE quality difference (obviously), but it made me really think long and hard on how I could 1. use my camera more and 2. make it easier. So the search began for a gimbal.

I ended up finding this one and have only played around with it a couple of times. I will do a Gimbal review in a future blog post and future video; however, for now, I just wanted to share my excitement with you :)

Do you have a gimbal? Leave a comment below and let me know which one you have and if you like it!

Wishing you nothing but a beautiful day!

Bessie

P.S. Want to see what gear I use? Head on over to the Gear Lists or check out these posts:

Black and White Lightroom Presets by Bessie Young Photography

Black and White Lightroom Presets

by Bessie Young Photography

Ok so we all know how much I absolutely love love love black and white images. I mean I may go to the ‘im a bit obsessed’ with black and white images. So…. It is officially official friends!!! I finally freaking made my black and white lightroom presets available! For Realz!

I love lightroom presets for a few different reasons:

  1. they will make your life easier

  2. they will make your editing faster

  3. they are easy to use

  4. they will help you find your style

  5. they will help you learn editing

  6. they will help you learn Lightroom

So for me, these are just a win win win. Now, let me tell you something friend. These are no traditional presets. No. They are not just a bunch of presets where you either like them or don’t. Oh not for this girl. I had to make them amazing. I had to make them worth it. I had to make them phenomenal. So how, or what did I do, to do that?

Well, I went above and beyond is what I did!! I decided to create what I needed when I was first starting out as a photographer. No, I didn’t know lightroom or how to edit, but by golly I was going to be a photographer so I needed a little bit of help. So check this out, the best thing about these presets are that you have complete control over all the presets with an easy to use interface which allows you to create the look you want one click at a time! I have included easy and quick contrast edits, vignetting edits, film edits, and more! Plus… these presets include everything from the standard black and white image, to the light and airy black and whites, and even to the very popular moody black and whites.

Black and White Lightroom Presets by Bessie Young Photography - Learn how to edit - Learn photography

Alright, so enough already, here are the deets:

Whats included in the BYP B+W Presets:

  • 8 Black and White Original BYP Presets (these are all 1 click edits!)

  • 4 FREE Black and White Presets

  • Contrast Settings

  • Vignetting Settings

  • Film Grain Settings

  • 3 color filters

Do you have any questions? Please please please comment below with your questions or send me a message via this contact form.

I am so dang excited about these presets and so dang excited to see your creations that come from them! Make sure to tag #bypshop or #thebypshop in your social media posts so I can see all the goodness!

Wishing you nothing but amazing, beautiful, and oh so awesome black and white photos!

Bessie


Love this post? Want to seem more? Check out these similar posts here:

Rocky Mountain National Park Sunset Landscape Photography

Rocky Mountain National Park Sunset Landscape Photography

by Bessie Young

Rocky Mountain National Park Sunset Landscape Photography Tutorial by Bessie Young Photography .jpg

I have always wanted to see a moose. Always. It has been a dream of mine or goal of mine to actually finally see one.

A few years ago, I went to Yellowstone and the Grand Tetons. I was super excited to be in these locations as I thought for sure I was going to see one. Well… not so much. It didn’t happen.

Then a couple years ago I was up in the northern most part of Idaho. I was certain this was my time to see a moose… well, it didn’t happen again.

This year I traveled over to Colorado to take a long road trip back to California. My goal was to just see some beautiful landscape. As I planned my trip, of course moose was on my mind. I researched where to see moose in Colorado and the Rocky Mountain National Park was one of those places so of course that was going to be my #1 destination.

As my plane got ready to land the pilot began to speak letting us know that there is ‘some weather’. Now what that meant no one knew, but one thing I did know was that could effect my Rocky Mountain National Park adventure. The plane landed, and it was slightly snowing in Denver. I wasn’t too worried about it, but did think there was a bit of potential that my travels were going to be thwarted.

Denver was my home for the night. It snowed all night. When I woke up in the morning there was a dusting of snow, so I got on my phone to check the conditions of the park. Of course the main road through the park was closed, but good news was the valley was still open! Yay!! I was pretty excited as the meadow was one of my main destinations and one of the main places that you would be able to see moose!

So, I packed up all my things and headed to the park. The pass to the park was beautiful and snowy, well actually the entire drive was beautiful and snowy. As I entered the park there were so many beautiful views and even better, there was absolutely no one there! It was like I had the entire valley of the park to myself! Let me tell you, this was a huge freaking treat.

I traveled through the limited open area of the park searching for moose along the way. To my disappointment there was none. I do not know much about moose habits; however, I was definitely wondering if the snow had ran them down into lower elevation.

Wildlife photography by Bessie Young Photography 2018-7.jpg

Since there were no moose, my next goal was a good sunset landscape photograph. As I was wandering through the park I found some amazing views. I made it all the way to the closed gate, I sat there for a moment watching the cutest birds ever, and then decided on my final location for my sunset photograph.

The location for my main sunset image was an easy decision. There was a beautiful meadow with a stream that meandered through, the snow capped gorgeous mountains in the back, and surprisingly the only cloud in the sky. The stream was the perfect leading line right up to the mountains.

After I knew that I ‘got the shot’ I started playing around getting a few different images. Here are a few additional images that I got of the sunset:

On my way back to my hotel I was driving uber slow with big hopes that I might see a moose. Unfortunately, I didn’t get to see one, but I was able to capture some pretty awesome images on my way.

I hope you all enjoyed this blog. Have you been to June Lake before? If so leave a comment below . I would love to hear about your trip!

Wishing you nothing but amazing adventures and pretty pictures!

Bessie


P.s. Did you like this blog? Check out these ones as well:

Fall Landscape Photography | June Lake California | Why have I never shared these?

Fall Landscape Photography | June Lake California

Why have I never shared these?

Landscape Photography by Bessie Young

Alright, lets chat a minute….

Last year I went on a trip to find fall. Fall is my absolute favorite time of year and I was determined to get some pretty fall images. Well on my adventure I ended up in June lake at the absolute perfect timing. All the aspens were gorgeous variations of yellows and oranges. I was ecstatic.

So I thought it was the perfect opportunity to create a beautiful fall landscape photography video. After I got all my footage and took some of the best fall images I have ever taken I got home and headed right to the computer to edit my video. I just HAD to share these images with you.

Well…. lets just say I was disappointed to say the least. The footage that I captured pretty much sucked. Yes…. sucked. I tried and tried and tried to make a video, but I just couldn’t. Everything about the video just wasn’t awesome. So I sat on it.

Later on I tried again to create the video because I just really wanted to share the images with you; however, I still just couldn’t. Maybe that is my perfectionist inside of me, but I just really didn’t like any of it. It was a crazy windy day which made for terrible noise. The video didn’t have much sequence behind it and seemed to just jump around like crazy. So again I didn’t post it.

Now it’s Fall of 2018. One whole year later. I thought to my self ‘hey this is the perfect time to post that video. Let’s do this!’ So again I tried and again I failed. Then I decided that there have just been too many times that I haven’t posted. Too many videos that I have created and that just end up in the recycle bin on my computer. Too many times that I have been a perfectionist and not shared some of the goodness with you even though it isn’t really up to snuff.

I decided that it was finally time to share this no matter what. So I created a different sort of video. Something that I wasn’t happy with, something that was less than par, and something that I forced myself to post anyways….

My thought behind this video is that it is better to share something less than perfect than to not share anything at all.

We are our own worst critics. We judge ourselves, talk negatively about our creations, and eventually just talk ourselves out of creating and / or sharing with others due to this idea that everything has to be just so.

Shop fall landscape fine art here:


I truly believe that so many amazing things have been created and thrown away just because the creator thought it wasn’t good enough. It could have been the next world masterpiece; however, it ended up in a trashcan somewhere.

So, it is time to just stop it. To stop throwing our creations away. So what if they aren’t perfect, and so what if they don’t get the best reviews. The idea is that you are still creating, still sharing, and still inspiring others. Plus, sometimes the imperfect things are really the best.

So here is my imperfect video with some of my best photos I have ever taken. Here is the video that I didn’t post for over a year because I judged everything about it. Here is a different take on my normal style, something that I am incredibly nervous to share and something that might have people judging my abilities, but here it is anyways.

I hope you all enjoyed this blog. Have you been to June Lake before? If so leave a comment below . I would love to hear about your trip!

Wishing you nothing but amazing adventures and pretty pictures!

Bessie


P.s. Did you like this blog? Check out these ones as well:

Stop and Celebrate! 500 Followers on Youtube!!!

Stop and Celebrate!

500 Followers on Youtube!!!

So I want to first of all say thank you all so much for all your love and support! This has been some sort of crazy adventure and it sure is an awesome one, but what is this blog post about really?

The point of this post is to freaking stop and celebrate! So often do we accomplish things that we have set out to accomplish only to just let them pass by with a blink of an eye. We forget to show gratitude, we forget to stop and realize how far we have come, and we forget to freaking celebrate.

If we just continue on down the road acting like these milestones are no big thing then they become no big thing. We get it in our head that we haven’t accomplished anything, we begin to feel down on ourselves, and our motivation goes out the window.

What does 500 followers on Youtube do for me? Absolutely nothing, but guess what…. it was a goal of mine this year. I wanted to make it to 500 followers and check it out… I did!!! That means 500 people like my channel. That means I can help 500 people learn photography. That means 500 people get to come along with me in my crazy adventures and I can inspire and help 500 people! That to me is fan-freaking-tastic!!! **insert fist bump here**

So, yes this blog post is to say thank you. Yes this blog post is to celebrate, and yes this blog post is to stop and realize how far I have come since I started my business, but ultimately this blog post is to tell YOU to stop and celebrate. Celebrate all the things big or small. Stop and have a beer, go out to dinner, take the night off, do something that makes you happy. Something that tells yourself congratulations.

This is me telling you to stop and celebrate! Take the moment to realize your accomplishments :)

ND Filter vs. No Filter

ND Filter vs. No Filter

Photography Tips and Tricks

Have you ever really wondered what an ND filter really does? Does it really make that much of a difference when it comes to taking a landscape photo? Well, my friend, I conducted a test for you guys so you can see what a 10 stop ND filter looks like in comparison to no filter at all.

Yes, I hiked 7+ miles one way just to conduct this test for you ;)

ND Filter vs No filter Landscape Photography Tips and tricks by Bessie Young Photography Landscape Photography.jpg

So let me start off with saying why I love my 10 stop ND filter. It is pretty amaze balls for when you are trying to do a few things:

  1. Photograph in the harsh light

  2. Photograph waterfalls or moving water

  3. Wanting to take a long exposure

I particularly like to use the 10 Stop ND Filter when I am wanting to have that nice smooth water effect, but I cannot have a long exposure. The Filter allows me to crank my shutter speed to 20” and lower during the middle of the day. How cool is that?!!

A Neutral Density filter allows a photographer to control the exposure in an image very easily. The filter stops light reaching the camera sensor, therefore allowing us to leave the camera with a higher aperture for a longer amount of time.

This blog post is strictly to show you the difference between using a filter and not using a filter. We will get into how to use an ND filter and what they are all about in a different post. So stay tuned!

When do you find yourself using a ND filter? Comment below and let me know :)

10 Stop ND Filter vs. No Filter:

Side by side comparison:

These photos were taken at high noon at about 10,000’ elevation with all the glare imaginable due to the granite backdrop and the water.

Photograph with No Filter:

Settings: ISO 64 | f14 | 1/60”

ND Filter vs No filter Landscape Photography Tips and tricks by Bessie Young

Photograph with 10 Stop ND Filter:

Settings: ISO 64 | f14 | 20”

ND Filter vs No filter Landscape Photography Tips and tricks by Bessie Young Photography

So there you have it. The 10 stop ND filter vs. No filter. I thought this would just be a fun comparison and help you see the difference between using a ND filter vs not using one :)

Wishing you nothing but a beautiful day!

Bessie


P.S. Did you love this post? Want to see more photography tips and tricks? Check this out here:

It Was A Miracle

Well here I am sitting at the DMV for the fourth time in a little over a month. How the heck does this happen? Do you really want to know? Well I decided to buy a truck from out of state... 

OK ok, let me tell you how I got to where I am today, sitting on a cold concrete bench, at 7 in the morning, waiting for the DMV to open.  

I sold my Toyota Tacoma over a year and a half ago. I was determined to buy another Tacoma as soon as I sold it, but nothing to my liking ever came up. You see, Toyota’s really do hold their value and yes I was being pickey. So a year and a half later I was starting to get ancey.  

My “Old” Truck:

One day the exact Toyota that I had been waiting for popped up in Washington! I was so dang excited, but a little nervous to buy a truck from out of state. I have only heard horror stories...  

Well, I decided to bite the bullet and make a bonzi trip to Washington. I thought it was the perfect excuse for a road trip and I have so many places in Oregon and Washington that I want to photograph so it was a win win win! I rented a car, left around 4 in the afternoon, and made it to Medford Oregon just before midnight.  

The next day was the day! The day I get my new truck! So off I went to continue my adventure. I decided to stop in Salem Oregon for some lunch at my favorite place... Chipotle. After eating my lunch in my car, you see I had to bring Yota with me, I continued on.  

Finally, I made it to Washington! I test drove the truck and it was everything I wanted. Seriously so dang excited! So we came to an agreement and I went to grab my wallet and to my surprise it was gone! Like gone gone! Like no where to be found gone! 

As I frantically tore my rental car apart I finally came to the conclusion that I had lost it. I traced my steps trying to figure out where abouts it could be and... DING... Chipotle. Yes the Chipotle in Oregon. So I took a deep breath, called the Chipotle, and to my dismay they did not heave it. After hanging up the phone I realized that I set everything on the roof of my car. Yes all my food, my drinks, napkins, utensils, and... dun dun dun.... my wallet. I figured all was lost at this point. Someone probably picked it up off the street after it tumbled off the roof while I dove away clueless. My heart sank. I didn't have any money, any credit cards, or any ID. It's amazing how our entire life is in our wallet. I was in Washington with nothing.

The only thing I had was a checkbook. So I asked the gentleman if he would be OK with me writing a check. I think he realized how freaked out I was and he agreed. Let me tell you there are really amazing people out there!  

So I purchased the vehicle with nothing but a check...  

After finalizing everything I was on a mission to get to Salem as quickly as I could in order to see if I could find my dang wallet. I figured it was a long shot, but I had to try. Yes that meant that all my Landscape Photography dreams were thrown out the window to be completed on a different trip... but I still had to try to find it. 

As I rolled into the Chipotle parking lot I scoured the streets. I went into every store asking if a wallet was dropped off, just fingers crossed that some amazing person turned it in. Nothing. ...

I walked up and down the road. Nothing...  

I drove around tracing my every move. Nothing...  

The last possible place that it could be was somewhere near the on-ramp to the freeway. At this point I was starting to accept the fact that it was gone. I started to try and figure out what in the literal heck I was going to do and how I was even going to get home.

So I slowly drove down the on ramp watching each side with a hawks eye. As I creeped closer to the highway I knew that it was over. I started to push the throttle to begin to merge and then... what is that?! MY WALLET!!!! There is was on the side of the on-ramp, open, with money and cards all over the place. 

It was a miracle - Bessie Young Photography.jpg

I pulled over in a flash, ran out to grab my wallet, and then started picking up all the things. Can you even believe it?! I know to this day I still can't! I found everything except $50 and a picture. Let me tell you I am so dang thankful. As I was walking up and down the side of the highway gathering all my money and all my things all I could think about is God is Good. Like so Good!  

So the rest is really history and here I sit at the DMV waiting to register my truck. Yes it's been multiple trips to the DMV, but it's not really bothering me :)

Now, I have a new truck for new adventures!

Bess


Hey! If you enjoyed this blog make sure to check these out:


Backpacking Dinkey Lakes Wilderness - Landscape Photography

Backpacking Dinkey Lakes Wilderness

Landscape Photography

I am just now finally posting about my backpacking trip back in August! Man where does the time go? Seriously though, just crazy. Anywho, lets get to it!

Hike to Cliff Lake - Base camp Day 1

There are two ways to get to Cliff Lake (two different trailheads). This trip I decided to take the trailhead out of Courtright Lake. The reason being that it is a paved road the entire way and the hike is about 1.5 miles shorter.

The Hike Details from the Trailhead to Cliff:

Distance: Approximately 5 miles. - everytime I hike to this lake my tracks shows a different number. Once it showed 4.75 miles, once it showed 5.5 miles, so I am averaging it out to be about 5 miles.

Max elevation: 9209’

Lowest elevation: 7979’

Trailhead elevation: 8363’

It ultimately took 2.75 hours to get to Cliff Lake from the trailhead.

Day 1 Sunset

I always have a few photography goals when I am out backpacking:

  • Document the trip

  • Get a few time lapses

  • Star shots

  • Sunrises for that nice soft water at the high mountain lake with the beautiful reflection

  • Sunsets with all the beautiful colors

After finding the perfect camping spot setting up base camp the sun just started setting and it was the absolute best sunset of the entire trip. I set up my camera for a fun time lapse and also got some amazazing shots!

Hike Around Cliff Lake - Day 2

Backpacking Cliff Lake - Dinkey Lakes Wilderness - Landscape Photography by Bessie Young - California Hiking Trails

Funny enough I have never hiked all the way around Cliff Lake. I have been here a handful of times but never actually have I hiked around it. So I decided day 2 was going to be a rest day just enjoying the beauty of the wilderness. During this time, I figured it was the perfect time to take a lesurely stroll around the lake.

For the most part the lake is easy to get around during the summertime. There is a nice trail that meandures around the lake and it is mostly flat. Then there is the cliff side of Cliff lake. Yes, where the cliff runs into the water. Now this is no joke, and definitely not easy to get around especially when you have a little dog. It doesn’t look too bad from the other side of the lake, but believe me it isn’t very easy. Now, it is definitely doable, especially if you didn’t have to worry about your Boston Terrier, but with Yota, it made it a little hard. I do have to say I ended up scooting on my booty with my dog in my lap a couple of times to make it to the other side :)

The walk around the lake took about an hour, but then again it took me much longer than it should have because of Yota and those steep rocks. It is definitely a must because the southerly side of the lake is the only spot that you can see Dog Tooth Peak from.

Day Hike to Little Lake - Day 3

On Day 3 I thought it would be perfect to hike to a lake called Little Lake. This lake is deep within the Dinkey Lakes Loop and rarely traveled to. It is about 2.3 miles from Cliff Lake to Little Lake. It is probably one of my favorite lakes for multiple reasons.

  1. There are always cute tree frogs

  2. It is the only place that I have seen Grouse

  3. It has pretty much the best view of Dog Tooth Peak

  4. There is never anyone here

  5. It has the best fishing of all the lakes

Hike Details:

The hike from Cliff to Little and back is not the easiest. Basically you go up a mountain and down the other side to reach Rock Lake. Then you continue downward to reach Little Lake. Now when you think about it, that means it is mainly uphill back to Cliff Lake.

Distance: 2.3 miles

Highest Elevation: 9961’

Lowest Elevation: 9081’

Elevation at Little Lake: 9493’

Round trip from Cliff to Little to Cliff: 4.6 miles

The Stars Came Out - Day 3

As I said previously one of my main photography goals is to get some awesome star photos. I loooooovvvvvveeeeee getting start photos of these beautiful high mountain lakes. It changes the perspective and makes it look like a completely different world. It is seriously awesome!

If you are interested I did make an entire blog post on How to Take Night Photos. Make sure to head that way for all my tips and tricks on how to get amazing shots like these ones!

The Last Day - Day 4 the hike out

The hike out is always the saddest time. It means that the trip is coming to an end. It means that reality is just around the corner. To remedy these post backpacking blues, I always make sure to pack a beer in my car for when I get back. This way when I am loading everything up I can enjoy it with a nice cold brewskie. I also make sure to pick a really yummy place to eat, because after multiple days eating dehidrated food, you really want ice cream or a big ole burger. This time I decided that my food of choice was going to be something from the Hungry Hut in Shaver Lake. (Yes I got a burger and a big ole berry shake. Amazing)!

I hope you all enjoyed this blog. Make sure to watch the video at the beginning to see a bit of the behind the scenes and how I got the shot.

Wishing you nothing but fun adventures, beautiful sunsets, and amazing memories.

Bessie


P.S. Did you like this blog? Check these ones out:


A New Logo for Bessie Young Photography!

A New Logo for Bessie Young Photography!

A new look for my business!!! I am so dang excited to announce my new logo! Holy moly! I have been wanting to create a new logo ever since I started my photography business, but I just didn't really know what to create. This logo has been years in the making and it is finally here! Woohoo!!!

So, what is the deal? Why did I do this really?

I created my original logo in a rush. I started my business and needed a logo, so insert quick pretty logo here. Now ever since then I had plans to change this logo, but I just didn't really know what to change it to. Now after 3 years of being in business I finally figured it out! Ya, 3 years seems like a long time, but it really did take me that long. This entire time I have been trying to really nail down where exactly I want to go with this photography business of mine and how I really want to brand it.

Starting out, my business was jumbled with a  bit of confusion on whether I was a landscape photographer or whether I was a portrait photographer. Well if you have stuck with me this long you know I am both! I definitely am not into pigeon holing myself because I love both equally; however, it has been a struggle to figure out how to work them both into by business without confusing people lol.

To be honest, I still struggle with it a little bit, but I think it finally worked. Now how does this all pertain to my logo? My logo was basic. Very simple and easy; however, I really wanted something that meant something to me and matched my brand. You see I am a landscape photographer and an outdoor portrait photographer that incorporates landscapes into the session. I mean how cool is it to be able to take landscape pictures with beautiful people in them? Well, its freaking cool! I digress.... back on topic :)

My logo needed to match my brand and it took me awhile to figure out exactly what that was. One day I started designing logos on paper. Really trying to make my logo beautiful and something that actually meant something to me. Something that I was going to be truly proud of. Well after multiple attempts I finally got it! It took me almost a full day to design this thing in Photoshop and I am just so dang proud!  So without further a due here it is the new Bessie Young Photography Logo:
 

New Logo Bessie Young Photography.jpg

So what do you think? I would love to know your opinion! Now each item in this logo means something personal to me and I am just so stoked!!!

So of course I had to make some cool Swag!!! Check out the new travel mugs and coffee mugs:

Thank you so much for all your encouragement and support. You are amazing and I don't tell you enough how much I appreciate you. Thank you!


I hope you all enjoyed this blog. Leave a comment below and let me know what you think.

Wishing you a very beautiful day!

Bessie

How To Take Night Photos

How To Take Night Photos

Photography Tips and Tricks

So, how in the literal heck do you even start to take photos at night in order to create a beautiful jaw dropping image?

All Images For Sale in the BYP Shop-

Click the image to purchase or click the buy me button below.

Well my friend I am here for you! I am super excited to share this video and blog with you for so many reasons, but the main reason is because for years, and years, and years I struggled with taking night photos.
I spent countless hours researching it. I had so many failed attempts testing out the tips and tricks that I was reading online , or in photography magazines, or watching YouTube videos .
I did all the things and still could not get good night photos. My pictures were dark, muddy, grainy, blurry, and everything bad about a photo.

After years of trial and error I have finally compiled some of the main tricks that I've learned and taught myself when it comes to taking night photos. I am so beyond excited to share this information with you guys to really help you , and help you not have to spend all the time doing all the research.

Tips on How To Take Night Photos

How To Take Night Photos by Bessie Young Photography Tips and Tricks - Landscape Photography.jpg
  1. Use a full frame camera

  2. Use a fast wide angle lens (aperture 2.8 or below)

  3. Invest in a good tripod

  4. Check the weather - make sure that the sky is going to be pretty much clear skies

  5. Make sure the moon is small or that there is no moon at all. A mood that is over a quarter moon is going to be way too bright.

  6. Scope out your location and find the best composition while it is day time and light outside.

  7. Focus your lens while it is day light! Oh my gosh this is huuugggeeee! I couldn't ever figure out how to get those tack sharp images. I would always "focus to infinity" because that is what everyone said to do, but guess what.... THAT DOESN'T WORK! Infinity has a little bit of wiggle room and that is really going to make or break your image. So after you are done scoping out your location (tip 5). Set up your tripod and focus your camera. This way, when it is dark outside you will not have to try to figure out how to focus. You will know already where to focus your camera at and you will be good to go!

  8. Shoot in Raw

  9. Start off with settings at ISO: 2000 | F2.8 | Shutter 10" and go from there. You are going to have to play around just like any other landscape photo. Make sure that you get a few variations and that way you can pick your favorite in post.

  10. Get a star app (I use PhotoPills)

Now go out there and try these photography tips and tricks on how to take night photos!

Leave a comment below and let me know what your favorite tips are or if you have any additional tips that I didn't mention :) . Don't forget to share this with all your shutter bug friends!

Wishing you nothing but a beautiful day!

Bessie


P.S. Did you love this post? Want to see more photography tips and tricks? Check this out here:

Do you take the time? Landscape Photography Tips and Tricks - Sunflower Fields in Sacramento

Do you take the time?

Landscape Photography Tips and Tricks

Sunflower Fields in Sacramento

So if you don't know by now I absolutely freaking love road trips! Growing up, that is what we did.... we took road trips. We saw some amazing things, made some of the best memories, and had the absolute most fun. Since going out on my own, I continue to road trip. It is like it is ingrained in every inch of me, it is part of my gypsy soul. To be honest, I crave road trips.

The Story

This past weekend I ended up taking a road trip up to Washington. On the way home it was late. I mean late late late. I was in Redding at about 3 in the afternoon which meant hitting Sacramento during the worst portion of the day, rush hour. This would then have me arriving around 10pm.

So I decided to stay in Redding for awhile in order to avoid traffic (i hate traffic). I went to a local brewery which was absolutely amazing called Fall River Brewery. Then I stopped at my go to out food, Chipotle. Finally, it was time that I could head on down the road and not hit crazy traffic in Sacramento.

As I was passing through Yolo there was this amazing sunflower field. I had to decide, do I stop to take some pictures, or do I just keep rolling because if I stop I am going to get home crazy freaking late...

Landscape Photography Tips and Tricks - Sunflower Fields in Sacramento by Bessie Young Photography

Do you stop to take the time?

So it was decision time... do I stop or do I continue? Obviously I ended up stopping, but it really got me to thinking.

There have been so many times that I have been on a road trip and didn't want to stop to take the time to take a photo. I regret each and every one of those times, but for some reason I still have that little voice inside my head saying that I don't need to stop, that it isn't a big deal, and that I am on a schedule.

Now am I really on a schedule? No not really. So why is it that we get so caught up in the have to get there right now kind of mentality? Why is it that we feel guilty for taking the time to stop? Why is it that we put a time schedule on E V E R Y T H I N G?

You see, it is difficult to schedule seeing the sunflower fields bloom especially when you live over 4 hours away. So why was I struggling so hard? Honestly, I do not have an answer for you, but I figured if I am struggling with this, then maybe you are too.

Take the time to do what you love

I wanted to encourage you to take the time. Take the time to do what you love. Yes, it might put you back 10 minutes or even an hour, but guess what... at least you took the time to get some epic photos.

We really need to stop rushing ourselves. We really need to stop and enjoy the roses, or sunflowers in this instance. Maybe you have no idea what I am talking about, maybe you think I am crazy for struggling with this, but maybe, just maybe you needed to hear this. I am hoping that I can encourage you to take the time for you. Take the time for what you love. In the end you will not regret it, you will only regret what you didn't do.

There have been way too many times that I regret not stopping. I missed out on some epic shots, but I am learning. I am growing, I am trying to get better, trying to quiet that silly voice inside my head.

You see, if I wouldn't have stopped I would have missed getting these epic shots:


This is my little message to encourage you to keep doing what you love, to stop and take the time to do what you love, and to not feel freaking guilty about it.

I hope you enjoyed this blog, and the video. Do you struggle with this? Leave a comment down below. I would love to chat with you!

Until next time my beautiful friend,

Bessie


p.s. do you like this post? Check out these similar ones:


Things don't always go as planned - Backpacking Devils Bathtub Graveyard Trailhead

Things Don't Always Go As Planned....

Backpacking Devils Bathtub

Landscape Photography by Bessie Young

Earlier in July I set off for a 4 day 3 night backpacking trip into the Ansel Adams Wilderness. The Graveyard trailhead starts at Edison Lake in Fresno California. The original plan was to stay at Devils Bathtub for a night and then head over to Graveyard lake for the remainder of the trip. Well let me tell you, things don't always go as planned.

The Trip to Devils Bathtub

The trip started off hot. The weather was calling for highs of 70 and lows in the lower 40's. The first day was a tad bit warmer than expected, but I started in the late morning so it wasn't too hot. I hiked from Edison lake to Graveyard Lake having to take quite a few stops to let Yota, my Boston Terrier, take a breather and cool off. We made it to the lake with plenty of time to enjoy the evening, set up camp, cook dinner, and just relax.

That night seemed incredibly warm, but I didn't think much of it. I didn't have my thermometer on, so I thought it was just my metabolism being heightened from the long walk in and the big pasta dinner I ate that evening.

Devils Bathtub Hike Details:

Distance: 4.5 miles one way

Elevation Gain: 1,551 feet

Trail Type: Out and back

Lake Elevation: 9,167 feet


Things don't always go as planned - Day 2

After packing up all my gear I headed off to Graveyard lake as planned. The day was getting hotter and hotter and with that I was getting a little concerned that Yota would be able to finish the hike.

About halfway to Graveyard I decided to take a break. You see Yota is a dog that will definitely out walk me, but not on this day. She wasn't panting hard, her tongue wasn't large, but she kept laying down every time I would stop. This was just weird. She is always out in front chasing lizards along the way. The break was the moment that I needed to make a decision. Was I going to head back to Devils Bathtub or continue on to Graveyard. As I sat there contemplating my day, Yota kept falling asleep. She was just so tired.

The Decision

I knew from the moment that I decided to take a break I was going to carry Yota. I might be overly cautious, but I couldn't imagine if anything happened to her. 

My choices were to hike to Graveyard which was all uphill, or head back to Devils Bathtub which was all downhill. Now Yota is 22 pounds and adding 22 pounds to an already 35ish pound pack is quite a big deal for me. So I decided to go with the flow, take it easy on myself, and head back downhill to Devils Bathtub.

Backpacking Devils Bathtub Graveyard Trailhead - Landscape Photography by Bessie Young Photography - California Hiking Trail

Ultimately it ended up being a really nice day after accepting the fact that I wasn't going to be able to see all the pretty lakes that I wanted to see.

When I got back to Devils Bathtub I ended up taking a nice long swim in the lake and then relaxing on the beach for the afternoon. After my lazy afternoon I set up camp and started to scope out my area in order to get ready to take some pretty sunset images.

That night I made sure to turn on my thermometer to see how cool it got. It ended up only getting down to 58, mind you it was supposed to be in the low 40's. Ya, so much different that what was forecast.

So, the moral of the story is to really just go with the flow. If I wouldn't have gone back to Devils Bathtub I woudn't have gotten some really pretty pictures and early morning shots. I also wouldn't have been able to just relax and enjoy the moment, the breeze, the fresh mountain air, and just being in nature.

I hope you all enjoyed this blog. Have you been to Devils Bathtub or Graveyard lake? If so leave a comment below . I would love to hear about your trip!

Wishing you nothing but amazing adventures and pretty pictures!

Bessie


P.s. Did you like this blog? Check out these ones as well: