
Ok, it is overwhelming. I totally get it. There are so many different lenses out there how do you know which one to buy as a beginner landscape photographer? Well that is why I am writing this blog post. I don't want you to waste your money! So honestly I spent a lot of money playing with lenses, buying new lenses, and then realizing the lenses that I actually needed . I want to save you that step. Basically I want to save you all the time, all the money, and all the frustration when it comes to lenses .
Read MoreBest Beginner Lenses for Portrait Photography
There are so many different lenses out there how do you know which one to buy as a beginner ? Well that is why I am writing this blog post. I don't want you to waste your money! So honestly I spent a lot of money playing with lenses, buying new lenses, and then realizing the lenses that I actually needed . I want to save you that step. Basically I want to save you all the time, all the money, and all the frustration when it comes to lenses .
Read MoreEssential Photography Gear for Beginners
So, you are thinking about getting into photography, but you aren’t sure where to start. There is so much dang information on the internet, how do you even know where to begin? Dude, you came to the right place and I am so freaking happy that you are here!
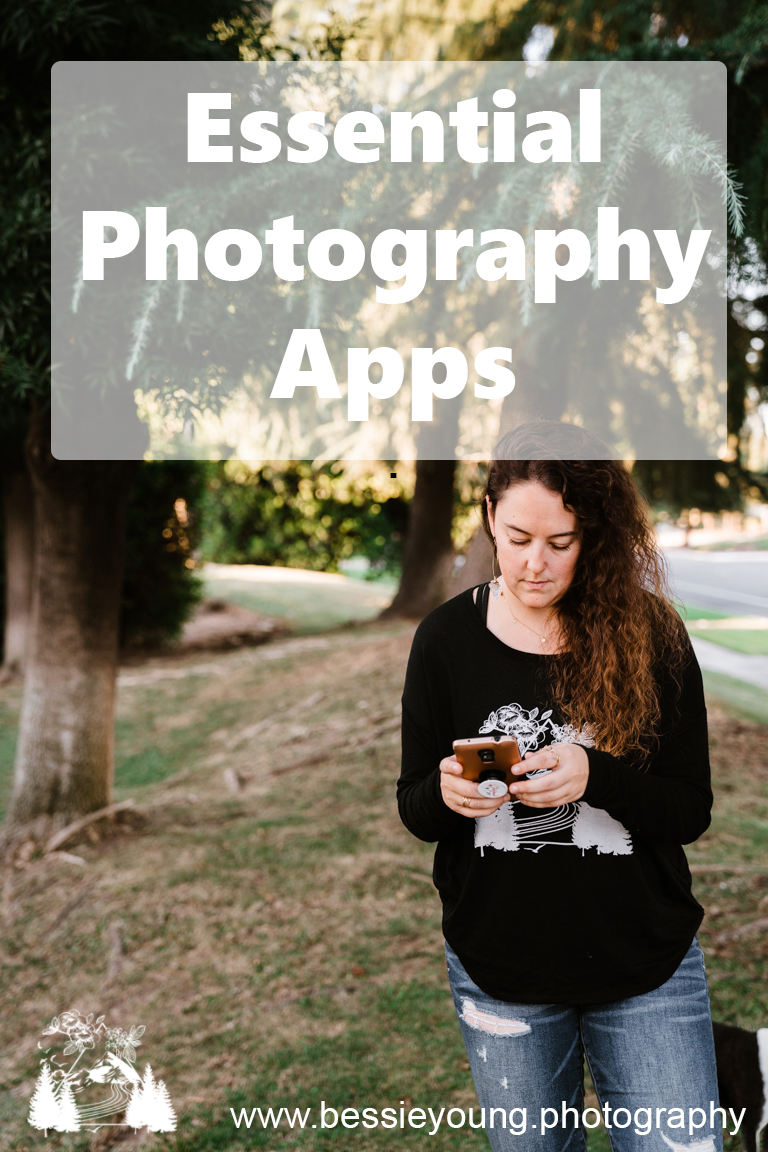
Read More5 Essential Photo Apps for Social Media
Wow social media….. where do I even begin. Holy moly this world has become obsessed with social media and I definitely have a love hate relationship with it. I have done so much installing and uninstalling of apps to be able to find good ones! So obviously I wanted to share this information with you! These apps have made my life so much easier.
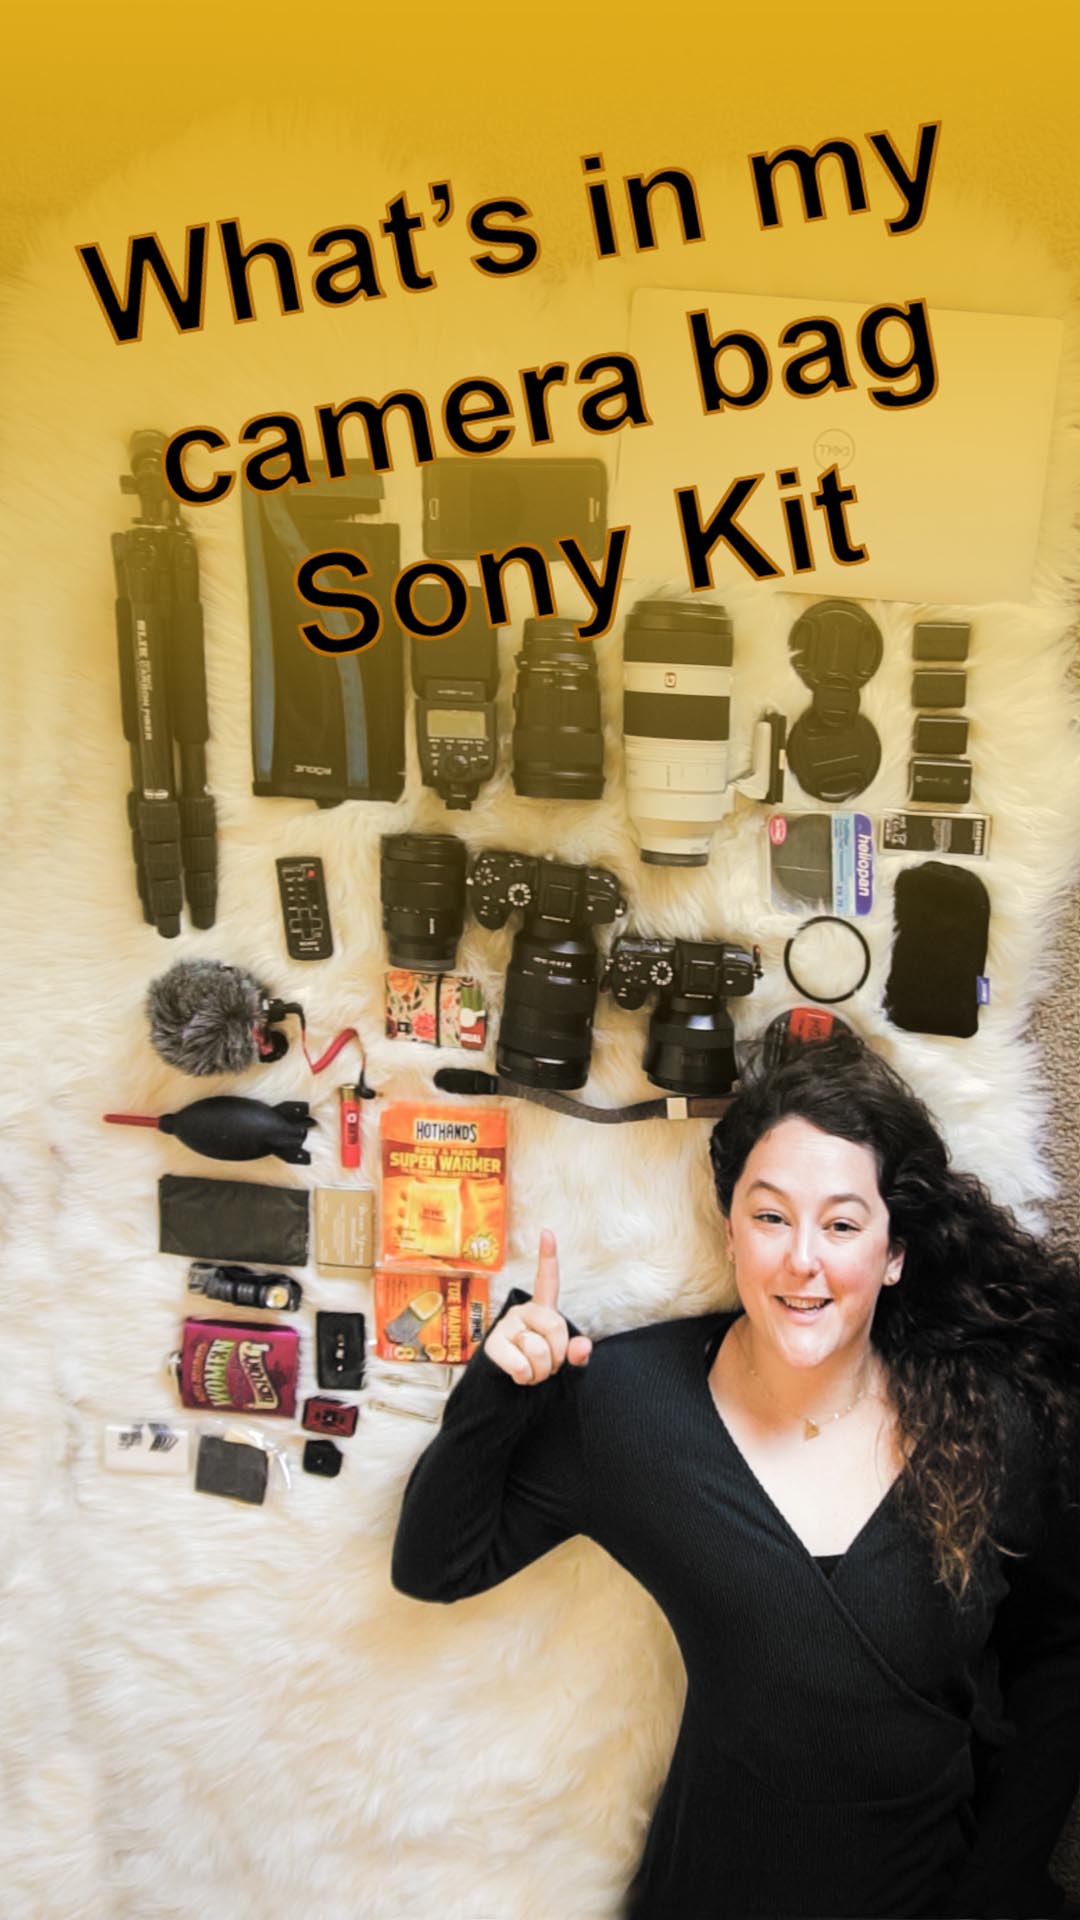
Read MoreWhat's In My Camera Bag - Sony Kit for Landscape Photography
What's In My Camera Bag - Sony Kit for Landscape Photography
Photography Gear
This blog has been a long time coming. I wanted to do this blog back when I started my photography business, but I was in the middle of major decision making when it came to gear. I was deciding on whether to switch from Canon to Sony or to just stick with Canon.
Then, after I decided to switch to Sony, I just didn’t feel comfortable doing a ‘Whats in my camera bag’ video. I am not sure why, but probably that whole imposter syndrome thing….
Then three years went by and still no video. I still felt weird doing one of these so I just didn’t.
Recently I was able to get a brand new camera bag from my friends down at Horn Photo and I figured it was the best time to actually do a video since I was going to be switching all my gear over to my new bag.
So, here it is…. All the things that I carry in my camera bag.
Now please keep in mind that I do not carry all of these things all of the time. Since I am an adventure photographer, a landscape photographer, and a wedding photographer, I have to pick and choose what to take with me for the occasion.
You do not need to always carry everything with you! Please remember that!
So, lets get into it
What’s in my camera bag - Sony Kit
Cameras:
Sony A7riii (my main camera)
Sony A7rii (my backup camera)
Sony 6500 (my camera for video)
Lenses:
Sony 24-70mm G Master F 2.8 lens (my go to lens for EVERYTHING)
Sony 100-400mm G Master F 4-5.6 lens (specifically for wildlife or close up landscapes)
Sony 16-35mm F4 lens (I never use this lens anymore. I only use the Batis for my wide angles)
Batis 18mm F2.8 lens (my go to landscape and wide angle lens)
Sigma Art 50mm F1.4 lens (specifically for portraits)
Tripods:
Vanguard Tripod (for everything)
Slik Tripod (for backpacking)
Filters:
Pro - Master ND Filter
Camera Straps:
Other:
DJI Ronin S Gimble (for smooth video)
Peak Design Clip for backpacking
Flash for weddings
SD Cards
Pro-Master Lens Caps
Sigma MC11 Adapter for Canon to Sony.
Hopefully that helps if you are on the fence about new gear!
What kind of shooter are you? Nikon, Canon, Sony, Fuji, Olympus, other? Leave a comment down below and let me know :)
Bessie
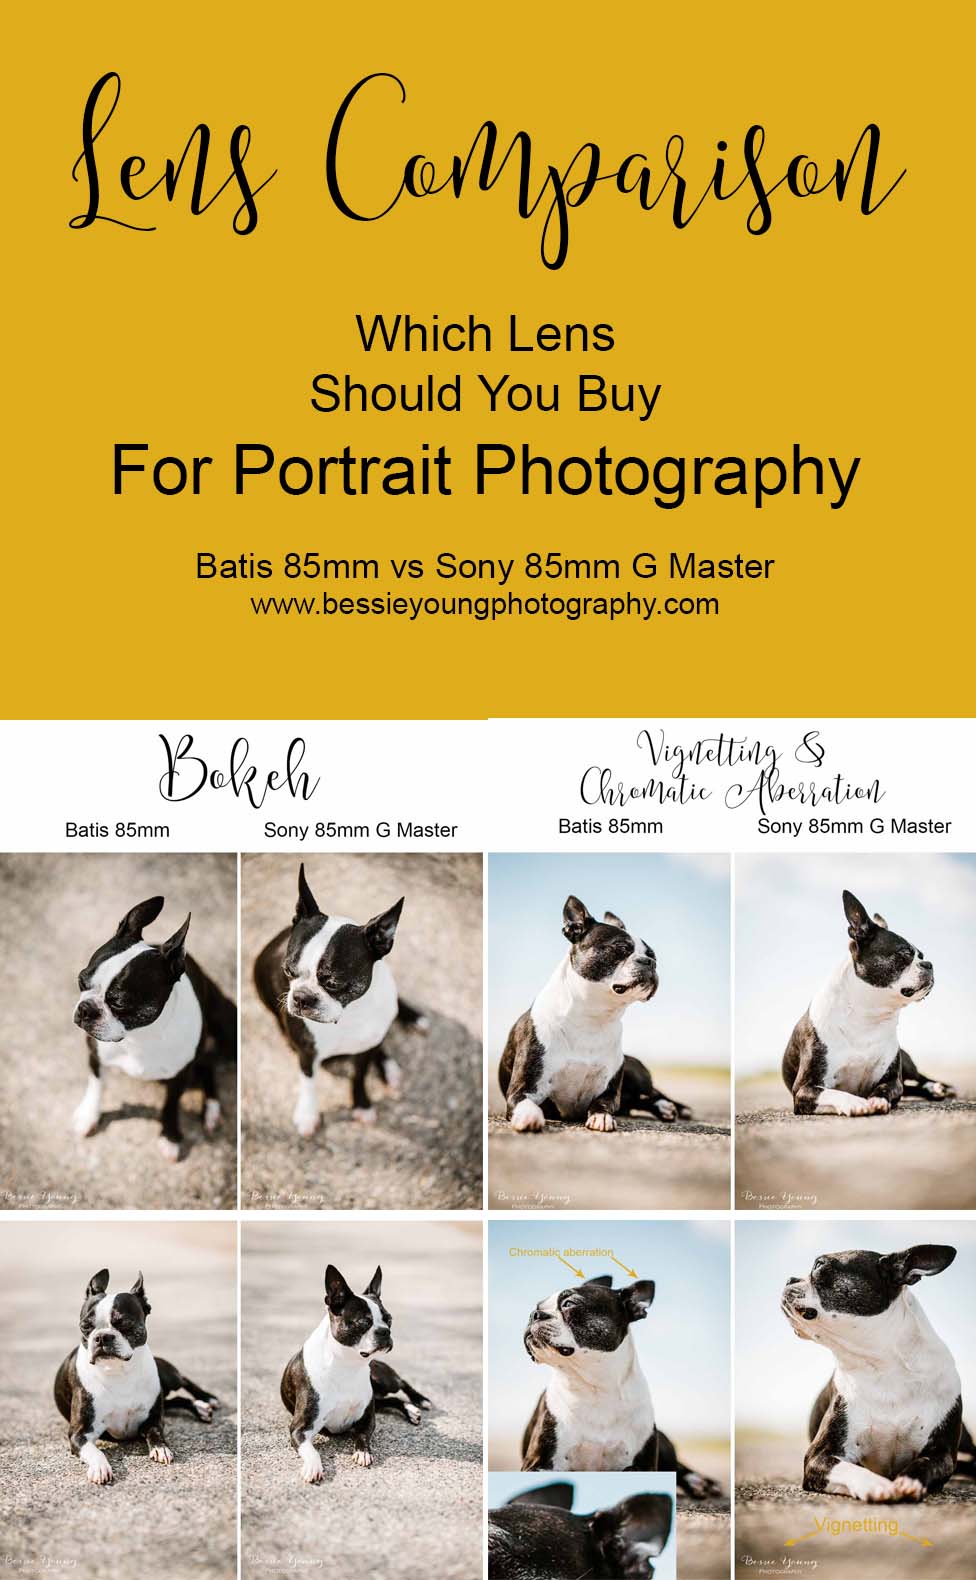
Batis 85mm Lens vs Sony 85mm G Master Lens - Lens Comparison
Batis 85mm Lens vs Sony 85mm G Master Lens - Lens Comparison
Photography Gear
Ever since I started using the Batis 18mm lens I have been extremely interested in Batis lenses.
Before we start this lens comparison, if you are looking for more information on the Batis 18mm or the lens comparison video for the Batis 18mm vs. the Sony 16-35mm make sure to check out the lens comparison blog here: Batis 18mm Lens vs Sony 16-35mm Lens
Now, I want to start off by saying that I do not own either of these lenses. I have been debating on grabbing an 85mm lens of some sort, but really didn’t know where to put my money. Do I buy the big boy, the Sony 85mm G Master? Do I spend all the money on the top of the line native lens, or do I save some money and not by a non native lens? Now, I figured if I had that question and that debate, others did too!
So, off I went to compare two lenses that I had my eye on. The Batis 85mm F1.8 vs. the Sony 85mm G Master F1.4 G Master. I was able to borrow these two awesome lenses from my friends down at Horn Photo. On a side note, if you are debating on equipment, or wishing you were able to check out equipment before you made that major purchase, make sure to check out your local camera shop like Horn Photo. You can actually rent gear for the day or the week! This could save you major money in the long run. I absolutely love this option, and have rented gear multiple times throughout the years. Whether I want to do a lens comparison, see if I like a certain item, or if I need something for an upcoming wedding but don’t want to purchase the item. Just rent it!!!
Ok, moving on :)
To start off there are a few huge differences for the Batis 85mm vs Sony 85mm G Master:
Price
Batis 85mm: $930
Sony 85mm G Master: $1800
Weight
Batis 85mm: 1 lb 3 ounce
Sony 85mm G Master: 2 lbs 7 ounces
Aperature Ring
Batis 85mm: No
Sony 85mm G Master: Yes
The aperature ring is super cool for video!
Aperature capability
Batis 85mm: F1.8 - F22
Sony 85mm G Master: F1.4 - F16


Filter ThreadFront: 67mm
Aperature: F1.8-F22
Length: 3.6 in.
Weight: 1lb 1 ounce
Price: $930

Filter Thread Front: 77mm
Aperature: F1.4-F16
Length: 4.2 in.
Weight: 1.8 lb
Price: $1800

Now lets talk about actual field experience and photo comparison…
An 85mm lens is typically used for portraits. I am debating on using the 85 as my second lens for backpacking. Right now I use the Batis 18mm and the Sony 24-70mm G Master. What I am thinking about doing is changing out the Sony 24 - 70 G Master with an 85mm. Now, with all that being said, I wanted to do a lens comparison for what these lenses are typically used for, Portraits!
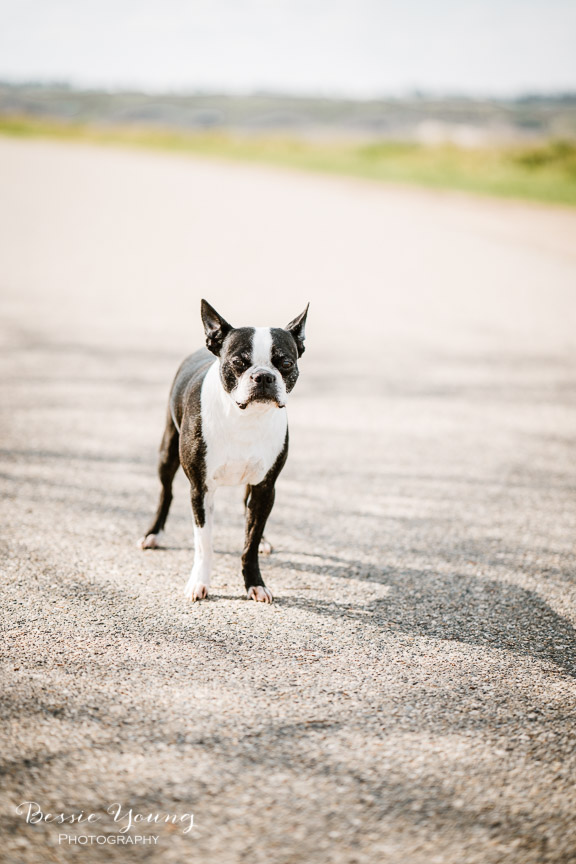
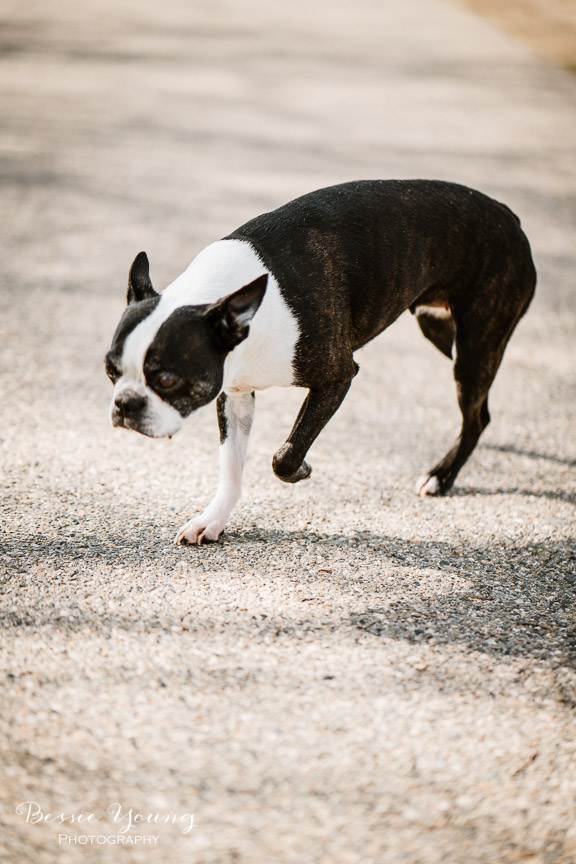
Luckily I have the cutest model in the world that just loves to have her picture taken… my Boston Terrier Yota :) In order to do an accurate lens comparison, I kept my aperature at 1.8 for all the photos. This way I didn’t compare an F1.4 to an F1.8.
In the field and during post processing I noticed a few main things:
Bokeh differences
Vignetting
Chromatic aberration
Automatic Focusing
Lens Noisiness/ Loudness
Bokeh:
There isn’t a huge difference with the Bokeh at F1.8. The thing I noticed most here was that the Sony had a creamier bokeh and the Batis had more of a swirl that was counter clockwise. If you look at the Batis image, it looks more like you are spinning. Really focus on the images below. Notice the swirl on the Batis? Do you see how the Sony is much more creamy?

Vignetting and Chromatic Aberration
So there are two things here and each lens has its fault. The Sony has a bit of chromatic aberration compared to the Batis. The Batis didn’t seem to have any chromatic aberration during my little session with Yota. Now, this was only tested during this session, so this doesn’t go to say that the Batis doesn’t have chromatic aberration in certain scenarios. See the images below.
Now with that the Batis has a bit more vignetting than the Sony. See images below.

Automatic Focus Speed and Sound:
Wow, now this is really where there is a major difference. Honestly, this was where my decision was made and where the Batis really took the cake.
The Batis was able to automatically focus quickly, capture movement, and didn’t make hardly a sound. The Sony on the other hand didn’t focus quickly at all. Actually, I wasn’t able to capture a single motion image in focus. Plus, during the focusing, it made the loudest noise ever, and just really annoyed me lol. I am not sure why it was bothering me so much, but it was at the point where I didn’t even want to use it any more. The focusing sound it made was really not awesome. Imaging being at a wedding, where everyone is silent, and your lens is making a focusing/ kind of grinding noise? I think that would ultimately suck. People would start listening to your camera rather than the vows!
Batis:


Sony:

Conclusion:
So, with all that being said, I will definitely be getting the Batis 85mm. There is just absolutely no reason not to! It is cheaper, lighter, focuses quicker, quieter, and the photos are almost the exact same as the Sony 85mm G Master. The aperature goes to F22 which is awesome for Landscape Photography and there is less chromatic aberration. The down side to the Batis is the fact that there is a bit of vignetting and the aperature doesn’t go as wide as the Sony; however, these are definitely things that I can work with.
What lens is your favorite? Leave a comment below.
Would you like to see a certain lens comparison video? Comment below and I can add it to my list :)
Wishing you a beautiful day!
Bessie
Photography Apps I Use
There are so many dang Apps out there how do you even begin to choose what Apps to use?
I have tried alot of apps. Like a lot a lot and to be honest most of them kinda sucked. It took alot of installing, time wasted, and uninstalling to find good apps.
Now, there are many different apps I use for photography. Some for landscape scouting, some for backpacking, some for editing on my phone, and some for social media. Yes… like I said… I use alot of apps. So lets get into it.
Are you learning Photography? Check out the freebie page to get you started! I have created a bunch of awesome freebies to help you out :)
Photography Apps I Use
Photography Apps For Landscape Photography:
I created a post on this one. I use two main apps for my landscape photography. Head on over that way to check that out. In short I use Back Country Navigator and Photo Pills. You can read the entire post all about why I chose these two apps here:
2 Essential Apps for Landscape Photography
Photography Apps For Social Media:

Snapseed:
This is one of the best photo editing apps I have found out there. If I take a photo with my phone, I can edit in in snapseed and not worry about how it is going to look on my instagram feed. It is beautiful! So now you can take some pretty awesome images on your phone and share away. Yay!!
Other:
Keep Notes
I keep all my notes on this. It is seriously the best and helps me stay organized. I use it for my business and for personal use. You can create different notes with different lists.
Playmemories
This is the app I use to hook up to my phone. The app makes it to where my phone becomes a remote. It also allows me to share the photos from my camera straight to my phone!
GPS Test
This little handy dandy app does quite a bit. The thing I use it for the most is to help my GPS lock onto the satellites when it is having a difficult time. It also shows the compass, how quickly you are moving, the date and time, sunset date and time, and where all the satellites are in the sky,
My Tracks
This tracks me everywhere. It is actually what I use for backpacking, hiking, walking, or running. It shows my speed, my distance, elevation gain and more! It allows me to add way points such as different cool landscape features, lakes, and so forth. I love this one specifically for the distance, speed, and elevation gain.
Blog
This is a Squarespace app. It is freaking awesome! When I come up with a blog idea I can just open this app and start a new blog post. To me this is just amazing. This way I don’t have to carry a notebook and I won’t have to let an idea slip away. Once I get back to my computer I can just open up my website, and BOOM! there it is! The new post that I started :)
Do you use any of these apps? If not, what apps do you use? Leave a comment below. This is a community for photographers to help other photographers. Lets create a list of awesome apps so we don’t have to keep wasting our time with the install / uninstall game. Leave a comment below with the app you use and why.
Wishing you the absolute best!
Bessie
Do You Need a UV Filter for Your Lens
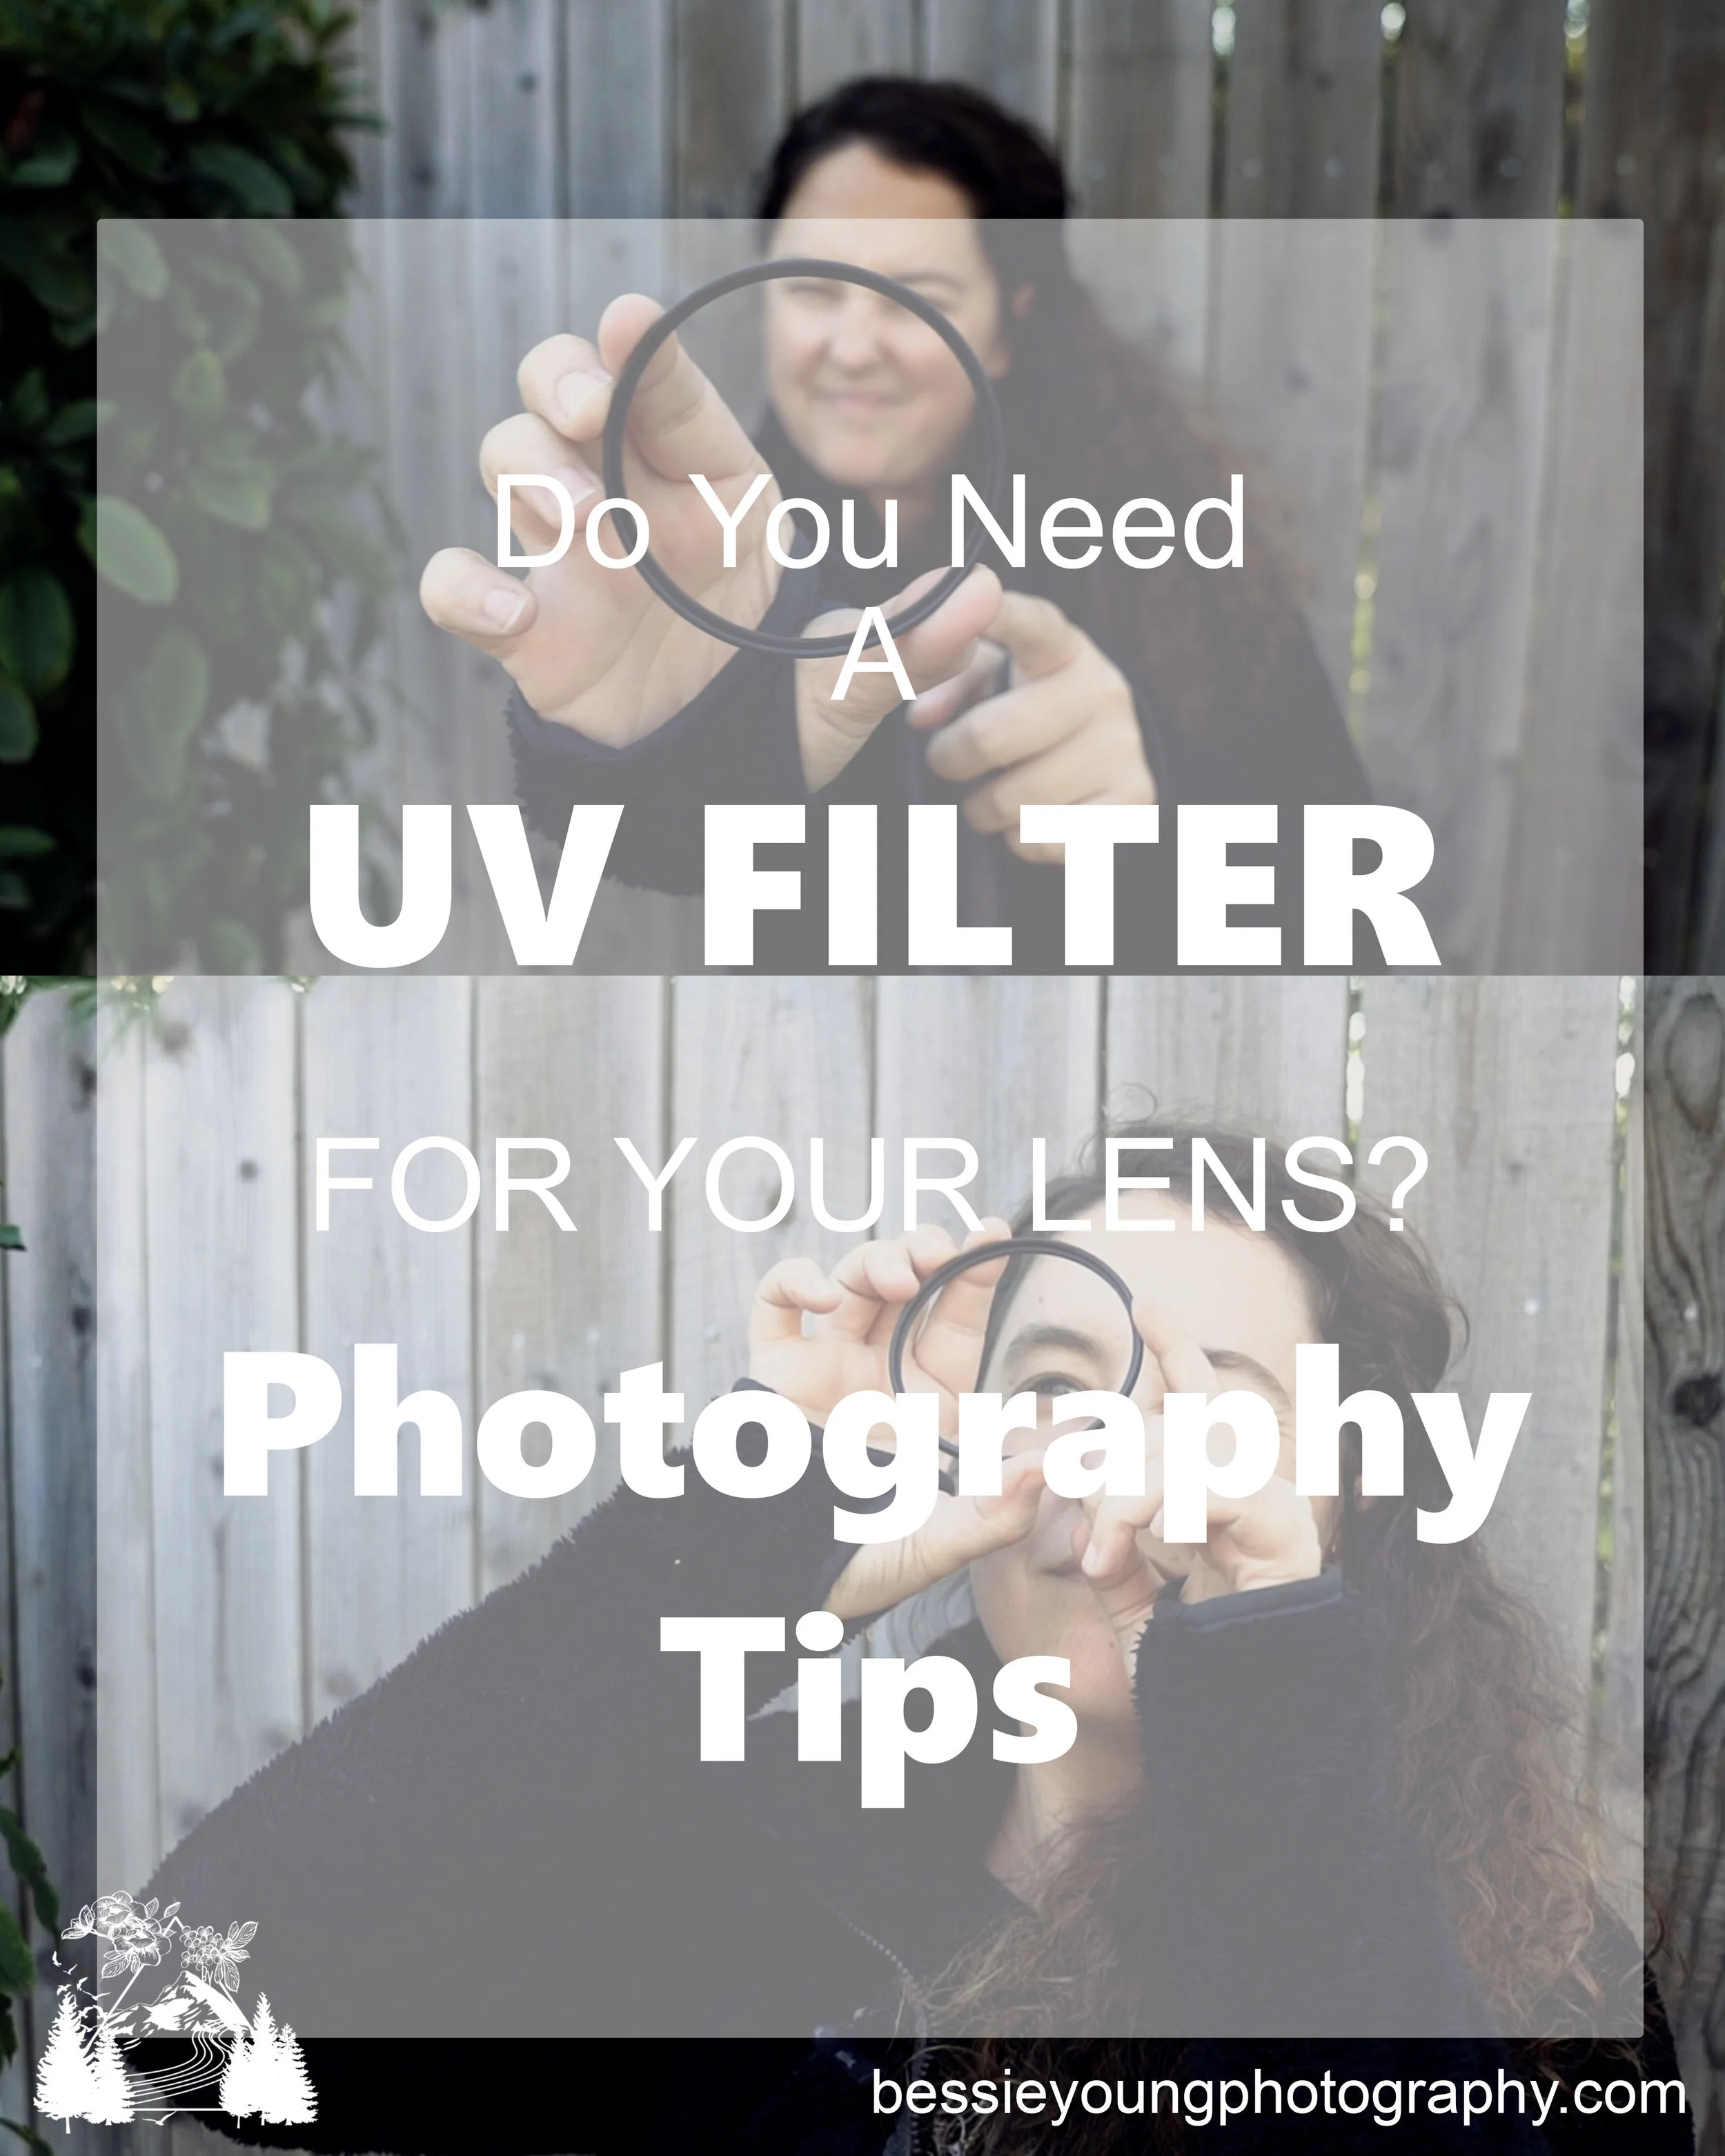
This question has been asked over and over again so I figured it would be a perfect post! Do you need, or should you use, a UV filter on your lens?
This is a very controversial question and one that is mainly based on an opinion. Many photographers will leave the filter on at all times where others do not. Is one right? Well, I think you should decide for yourself.
Before we get into it lets get some basics:
Are you learning Photography? Check out the freebie page to get you started! I have created a bunch of awesome freebies to help you out :)
What is a UV filter?
A UV filter is a glass filter, just like most others, that will attach to your lens. It is meant to block ultra violet light rays. It also removes the blue cast from images taken during a very bright day, or bright sunny conditions.
Do You Need a UV Filter for Your Lens?
Lets bring up the most common arguments, pros vs. cons
Pros for using UV filters all the time:
The UV filter provides protection for the lens from damage
Oh my gosh there is only 1 thing worse than dropping your camera…. picking it up and seeing your lens shattered. I haven’t had this happen to me, thank the lord, however, I have heard horror stories. I have also heard amazing stories as to how the UV filter saved the lens. Now, in my opinion, that is a pretty good investment. I would rather lose a $100 UV filter than lose a $2k lens.
To play the devils advocate though, if you drop your lens to where your UV filter shatters, wouldn’t that also ruin your lens internally due to the impact?
The UV filter keeps my lens clean. No dust, dirt, scratches, finger smudges, and so forth
This is true too. The UV filter is an extra layer of glass; therefore, it will keep all the dust and grime off of your lens glass. It is also a flat piece of glass which is much easier to clean when needed.
If the filter does get scratched then it is much nicer to have to buy a $100 filter rather than a $2k lens.
Cons for using UV filters all the time:
The filter causes a loss of image quality
This is true in theory. Yes adding glass to glass can reduce the image quality. But the loss is going to be so small in practice that you need to really ask the question of ‘is the loss of image quality significant and going to effect me?’
Loss of light
I have never seen this. Adding a piece of goo quality glass to your lens, that is clear, should not effect the amount of light that enters your sensor.
Loss of resolution
As long as you are using a good quality UV filter you will not see any significance in the quality on a normal lens. A good quality filter will have optically flat surfaces and should not disturb the direction of the light that will pass through the filter.

In Conclusion
Ultimately, I do keep a UV filter on my lens, but the choice is really up to you. Again, you need to choose if the ‘loss of image quality is significant’ to you.
I do need to warn you though… if you put a cheap filter on your lens and in front of your expensive glass you are ultimately creating a lens with the image quality of that cheap filter. Do not buy a cheap filter. Basically all I have to say is :
Cheap low quality filters are NOT acceptable.
Filters are not the funnest thing to buy, lets just be honest; however, they are important, keep you creative, and can be incredibly helpful. Make sure to get yourself a good quality UV filter. Expect to spend in the $100 range when purchasing a good quality UV filter.
I got my filter from Horn Photo and love it. I have not seen any negative effects to my image quality with it. If you can go to Horn, then make sure to do so. They are an amazing company and local small business. If you cannot go there, then I would check out the Zeiss, the Heliopan , or the Hoya .
Do you use a UV filter? Comment below and let me know. This blog is meant to be a community helping each other out, growing our businesses, growing our knowledge, and so much more. We are seriously so much stronger together!
Bessie
How To Print Photos From Your Phone - Print on Location
How To Print Photos From Your Phone - Print on Location

I am a HUUUGGEEEE believer of printing your images. Yes, I think it’s crazy important. In todays world, everyone thinks that me most important thing to have is digital images. Well I do believe those are important printing your images is just as important. You need to hold your images in your hands, hang them on your walls, put them in photo albums, share them with friends, and just do all the things with them.

As you guys know I do both Landscape photography and Portrait photography. I love love love to spoil my customers, I love to be able to hand an image to someone and see their expression, and I just love printing pictures lol. (how many times can I say that?! So, I have been on the search to print images on location.
I figured it would be the coolest thing to be at a portrait session or a wedding and be able to hand a printed image to my people. We are so used to getting things right now, and I want to be able to provide that kind of service.
I also wanted to be able to be at a family party and hand a print over to my sisters after a silly selfie :O
So, the search began and I found the coolest little printer you ever did see!!! It is called the

There are so many things I love about this little printer.
It is small which is perfect for packing around while you are on a shoot, or just putting in your purse while you are at a party
It is easy to use! All you need to do is download the app and boom!
The battery lasts a long time
The printer prints quickly
The picture size is awesome. Perfect for wallets!
Now, with the pro’s always comes the cons. So here are the things I don’t like:
Only holds 10 sheets of paper
The color is off
The quality isn’t that great
Now, the con’s really aren’t that bad because I only print in black and white. If I am going to print a photo for my clients I do not want to print it in color because then they might get the idea that their images will look like what is printed. If you print black and white, they get the picture, the immediate satisfaction, and great customer service. They walk away smiling and super excited to see the rest. Not to mention it places a small little thought in their head that prints are awesome!

There is also a bunch of other super cool printers that are incredibly similar. So check out these tiny little printers:
Are you learning Photography? Check out the freebie page to get you started! I have created a bunch of awesome freebies to help you out :)
I hope you guys enjoyed this little post :)
If you want to see more gear make sure to head on over to my gear lists!
Wishing you the very best and super pretty pictures!
Bessie
Unboxing the Ronin S Gimbal Stabilizer for DSLR or Full Frames
Unboxing the Ronin S Gimbal Stabilizer
for DSLR or Full Frames

I finally did it! I finally bought a gimbal! I couldn’t decide which gimbal to buy, because honestly there are just so many freaking options. One day I was watching a Peter McKinnon video all about this amazing gimbal. Honestly that video couldn’t have come at a better time! I was struggling with making a decision on which one to purchase, but after that video I was sold! I hoped on amazing and Boom! Gimbal bought!
Alright, so what is the reason for this Ronin S Gimbal? Why would I buy it you ask? Well, as you all know I have been slowly learning how to take video, and slowly throughout this year I have been up-ing my video game. I started my youtube channel with nothing but my cell phone. I then upgraded to my cell phone and a selfie stick.
This year, I decided I really needed to do better. I mean better and prettier videos. I want the videos to be informative as well as entertaining and beautiful to watch. So, on and off all year I was combining using my Sony A7riii, my Sony 6500, and my cell phone for my videos. I used what ever worked best at the time of the video. Since starting to use my camera, I have noticed a HUUUUGGGGGEEEE quality difference (obviously), but it made me really think long and hard on how I could 1. use my camera more and 2. make it easier. So the search began for a gimbal.
I ended up finding this one and have only played around with it a couple of times. I will do a Gimbal review in a future blog post and future video; however, for now, I just wanted to share my excitement with you :)
Do you have a gimbal? Leave a comment below and let me know which one you have and if you like it!
Wishing you nothing but a beautiful day!
Bessie
P.S. Want to see what gear I use? Head on over to the Gear Lists or check out these posts:


ND Filter vs. No Filter
ND Filter vs. No Filter
Photography Tips and Tricks
Have you ever really wondered what an ND filter really does? Does it really make that much of a difference when it comes to taking a landscape photo? Well, my friend, I conducted a test for you guys so you can see what a 10 stop ND filter looks like in comparison to no filter at all.
Yes, I hiked 7+ miles one way just to conduct this test for you ;)

So let me start off with saying why I love my 10 stop ND filter. It is pretty amaze balls for when you are trying to do a few things:
Photograph in the harsh light
Photograph waterfalls or moving water
Wanting to take a long exposure
I particularly like to use the 10 Stop ND Filter when I am wanting to have that nice smooth water effect, but I cannot have a long exposure. The Filter allows me to crank my shutter speed to 20” and lower during the middle of the day. How cool is that?!!
A Neutral Density filter allows a photographer to control the exposure in an image very easily. The filter stops light reaching the camera sensor, therefore allowing us to leave the camera with a higher aperture for a longer amount of time.
This blog post is strictly to show you the difference between using a filter and not using a filter. We will get into how to use an ND filter and what they are all about in a different post. So stay tuned!
When do you find yourself using a ND filter? Comment below and let me know :)
10 Stop ND Filter vs. No Filter:
Side by side comparison:
These photos were taken at high noon at about 10,000’ elevation with all the glare imaginable due to the granite backdrop and the water.

Photograph with No Filter:
Settings: ISO 64 | f14 | 1/60”

Photograph with 10 Stop ND Filter:
Settings: ISO 64 | f14 | 20”

So there you have it. The 10 stop ND filter vs. No filter. I thought this would just be a fun comparison and help you see the difference between using a ND filter vs not using one :)
Wishing you nothing but a beautiful day!
Bessie
P.S. Did you love this post? Want to see more photography tips and tricks? Check this out here:
Featured


A New Logo for Bessie Young Photography!
A New Logo for Bessie Young Photography!
A new look for my business!!! I am so dang excited to announce my new logo! Holy moly! I have been wanting to create a new logo ever since I started my photography business, but I just didn't really know what to create. This logo has been years in the making and it is finally here! Woohoo!!!
So, what is the deal? Why did I do this really?
I created my original logo in a rush. I started my business and needed a logo, so insert quick pretty logo here. Now ever since then I had plans to change this logo, but I just didn't really know what to change it to. Now after 3 years of being in business I finally figured it out! Ya, 3 years seems like a long time, but it really did take me that long. This entire time I have been trying to really nail down where exactly I want to go with this photography business of mine and how I really want to brand it.
Starting out, my business was jumbled with a bit of confusion on whether I was a landscape photographer or whether I was a portrait photographer. Well if you have stuck with me this long you know I am both! I definitely am not into pigeon holing myself because I love both equally; however, it has been a struggle to figure out how to work them both into by business without confusing people lol.
To be honest, I still struggle with it a little bit, but I think it finally worked. Now how does this all pertain to my logo? My logo was basic. Very simple and easy; however, I really wanted something that meant something to me and matched my brand. You see I am a landscape photographer and an outdoor portrait photographer that incorporates landscapes into the session. I mean how cool is it to be able to take landscape pictures with beautiful people in them? Well, its freaking cool! I digress.... back on topic :)
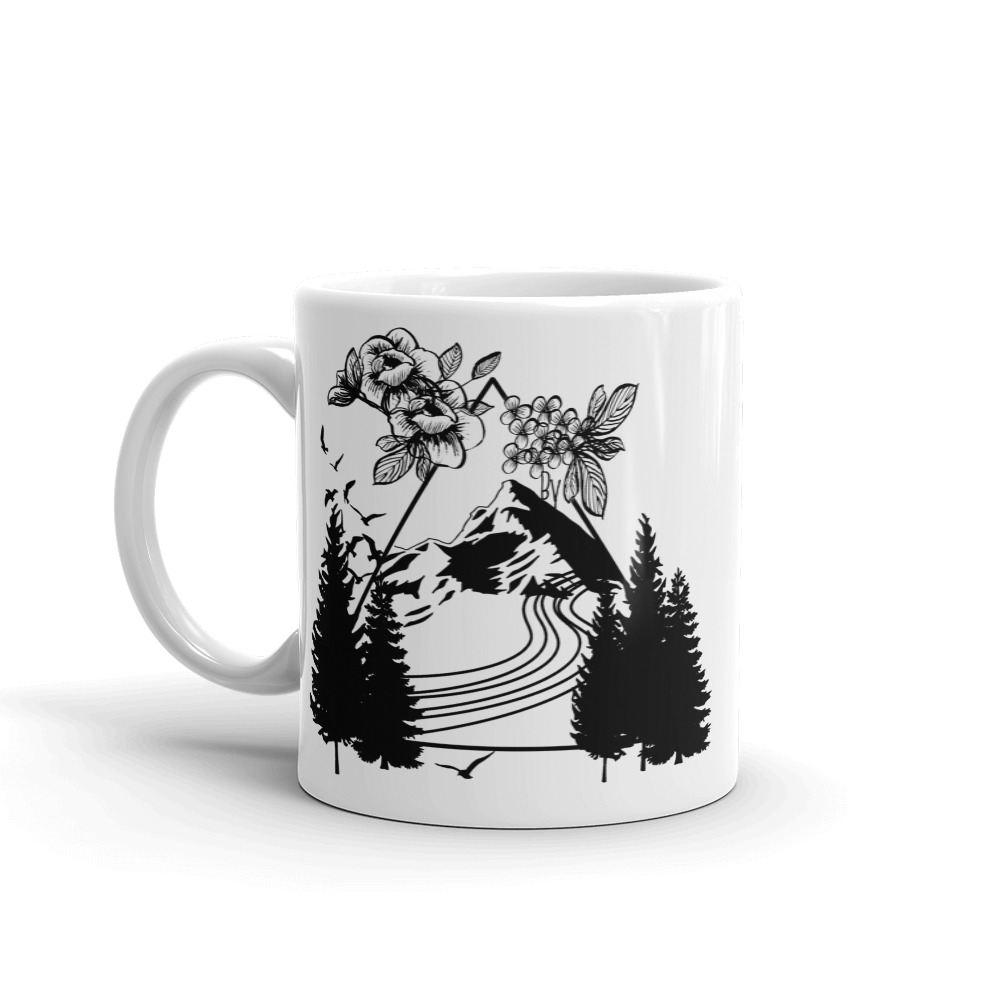
My logo needed to match my brand and it took me awhile to figure out exactly what that was. One day I started designing logos on paper. Really trying to make my logo beautiful and something that actually meant something to me. Something that I was going to be truly proud of. Well after multiple attempts I finally got it! It took me almost a full day to design this thing in Photoshop and I am just so dang proud! So without further a due here it is the new Bessie Young Photography Logo:

So what do you think? I would love to know your opinion! Now each item in this logo means something personal to me and I am just so stoked!!!
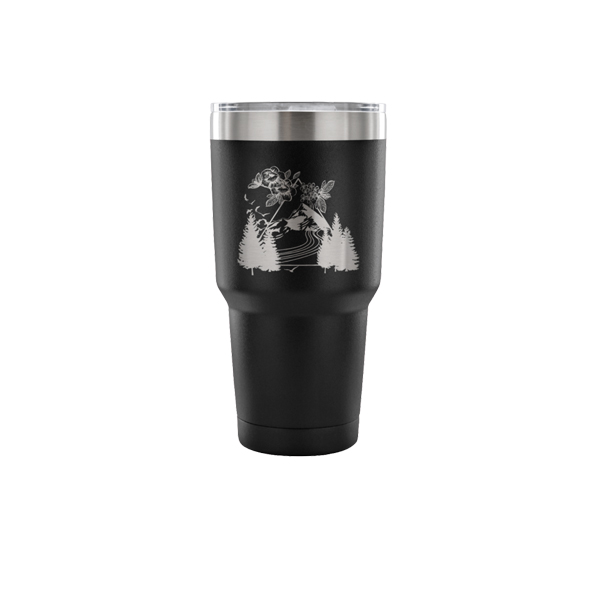
So of course I had to make some cool Swag!!! Check out the new travel mugs and coffee mugs:

Thank you so much for all your encouragement and support. You are amazing and I don't tell you enough how much I appreciate you. Thank you!
I hope you all enjoyed this blog. Leave a comment below and let me know what you think.
Wishing you a very beautiful day!
Bessie
Camera Gear for Backpacking
Camera Gear for Backpacking
What's in my bag
Recently I was out backpacking on my first trip of the year and I thought what better time than to make a video about camera gear for backpacking!?

I'm not going to lie, I debated on making this video because I was freaking exhausted. Yes... I had just hiked a bunch in the heat and all I wanted to do was zone out, but I got my lazy booty outta my chair and made this video just for you!
So, here are all the Camera Gear for Backpacking Things:
1. Camera and Lens:
- Sony A7rii
- 18mm Batis f2.8.
- 24 - 70mm G master f2.8
2. Filters:
- 10 stop ND filter
- Heliopan Circular Polarizer
3. Cleaning Kit
- Rocket Blower!
- cleaning cloth
- Q-tip
- lens cleaner
4. Spare lens cap
5. Batteries:
- Sony batteries
- Anker Battery pack
6. SD Cards: Bring all the SD cards :)
7. Tripod
8. Peak Design Clip and foot
That's it!
Let me know what camera gear you take backpacking in the comments below.
Wishing you a beautiful day and dust free photos!
Bessie
p.s. do you like this post? Check out these similar ones:
What Camera Strap To Get - My Favorite
Camera straps are super important, but how do you know which one to get? Well today I am going to chat a little bit about camera straps and also share my favorites.
So What Camera Strap to Get:

So I just started checking these out. I typically hold my camera with no strap while I'm out on a shoot, but I started to think of how bit of a bummer it would be if I accidentally dropped it. Then I was talking to a fellow photographer, Danyelle Dee, and she was saying that she stepped on a bee during a shoot, got stung, and dropped her camera; however, she had a strap which saved everything! Then and there, I figured I needed to purchase one, so I ended up getting the Peak Design Wrist Strap: I will let you know what I think of it as I use it more. I chose the peak design one because of how easy they are to switch back and forth with their clipping system. There are also some leather Ona Wrist Straps that I saw which look pretty neat.

So there are a bagillion different camera straps out there, so how do you decide? For me, I like them to be a bit wider of a strap. I have found that the smaller, thinner straps seem to dig in to my shoulder and neck too much . Another think I like is if there is a little bit of a cushion on the shoulder area. My favorite so far is this peak design camera strap. I love the color options, how thin and light they are, and how easy they are to switch between cameras. Another option are these beautiful leather camera straps by Ona. I have heard great things. The only con to buying leather is taht it will stretch overtime.

These are awesome if you are a wedding or portrait photographer. They have the option of holding two cameras, one on each side. I haven't ever tried them; however, I have seen them in action and they are amazing!

Clips:
Ok not really a camera strap but a clip is totally an option and something I use for all my backpacking adventures. I absolutely love the Peak Design Clip.
Do you have a favorite camera strap? Leave a comment below and let me know :) I am always on the look out for good things :)
Wishing you the best,
Bessie
p.s. like this post? Check these out:
How To Clean Your Camera Sensor

How To Clean Your Camera Sensor
The One Tool You Need
So I wanted to let you in on a little secret of mine and that is a tool that I use on a regular basis. When I switched to a mirrorless camera I was coming across the issue of constantly having dust on my sensor. Now, this rarely happened with my Canon DLSR camera so I wasn't sure what to do.
Now, with a mirrorless camera everytime you change out a lens you expose your sensor to the wide open world. This allows all the tiny little dust bunnies to attach to your sensor in a heart beat. No matter what I did to try to protect my sensor from dust, it seemed as though it always collected dust when I changed a lens.

You don't notice the dust while you are out on location. You look at your LCD screen, think the shot is amazing, and move on. Then you get your images in home and notice all the tiny little dust spots scattered throughout your image completely ruining it. Talk about incredibly frustrating!
I was doing quite a bit of research and I found what is known as the Rocket Blower! OMGEEEE you guys this changed
E V E R Y T H I N G!
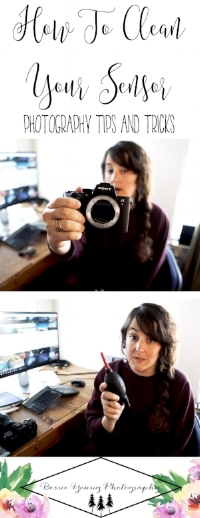
It actually has enough force to clear the sensor of the majority, if not all, dust and better yet it does it with out having to touch your sensor!
Now, how did I not know about this before, don't ask me. I guess I just never really needed it, but with a mirrorless camera you need this in your life! You seriously need this in your life! Like right now! Plus it is only $12 so it is a no brainer ; )
Alot of you might be like, DUH Bessie, but I figured that if I didn't know about it, some of you didn't know about it as well. If I can help at least one of you to save the frustration and the ruined images then I did my job.
Let me know what you use to clean your sensor in the comments below.
Wishing you a beautiful day and dust free photos!
Bessie
p.s. do you like this post? Check out these similar ones:
Essential Filters for Landscape Photography
Essential Filters for Landscape Photography
What Filters I use
Oh Filters how I love you...

Camera filters are truly an amazing thing. They help you really create a photo in the field rather than create the photo in your post processing. There is something about creating the photo at the moment that you took it. As you know, I am not a huge fan when it comes to post processing. I want to create the image in camera rather than add different effects in post processing. My goal is to reduce my time at the computer and increase my time taking pretty pictures ;)
So, here are a few filters that I have and love:
1. Heliopan Circular Polarizer
This is my go to filter for everything Landscape Photography! I love this filter and a filter I consider a must for any landscape photographer.
2. 10 Stop ND Filter
This filter has truly allowed me to get some amazing shots during the middle of the day. It is like sunglasses for your camera.
3. UV Filter
This filter is a must to protect your gear! That is pretty much all I have to say about this. If you end up dropping your lens, you will crack your UV filter rather than your lens glass. These UV filters are insanely expensive, but worth it in the long run. A lens can be thousands upon thousands of dollars. It is worth the extra $100 for that just in case... it is a security blanket in my opinion.
Leave a comment below and let me know what your essential go to apps are. I am always looking for awesome apps when it comes to photography and adventure.
Wishing you the best,
Bessie
p.s. like this post? Check these out:
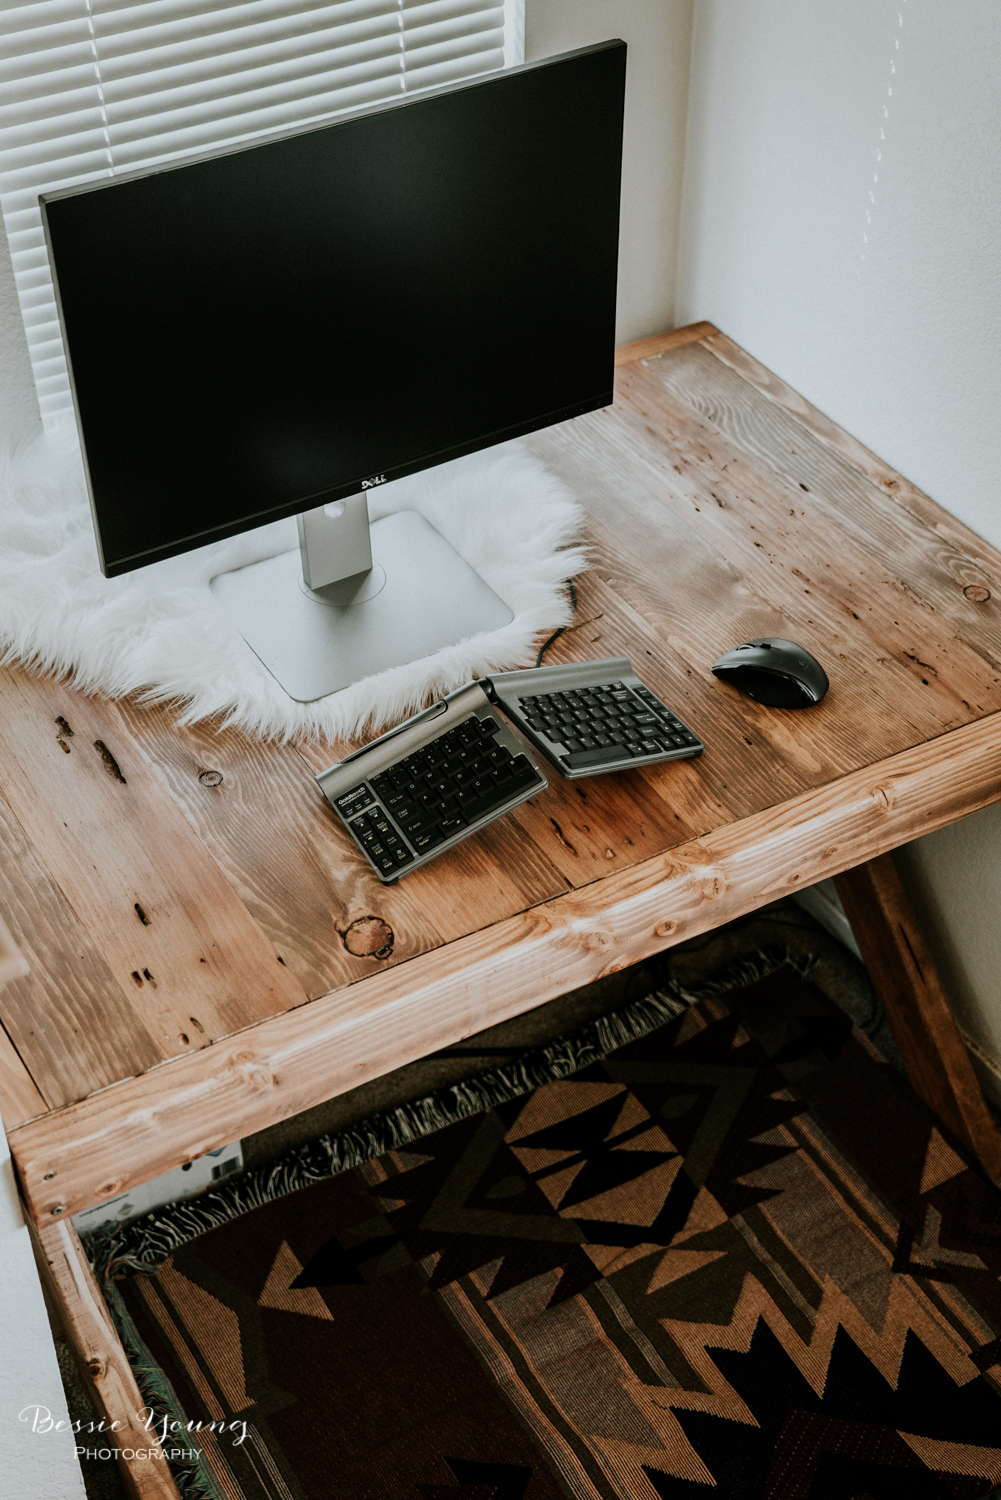
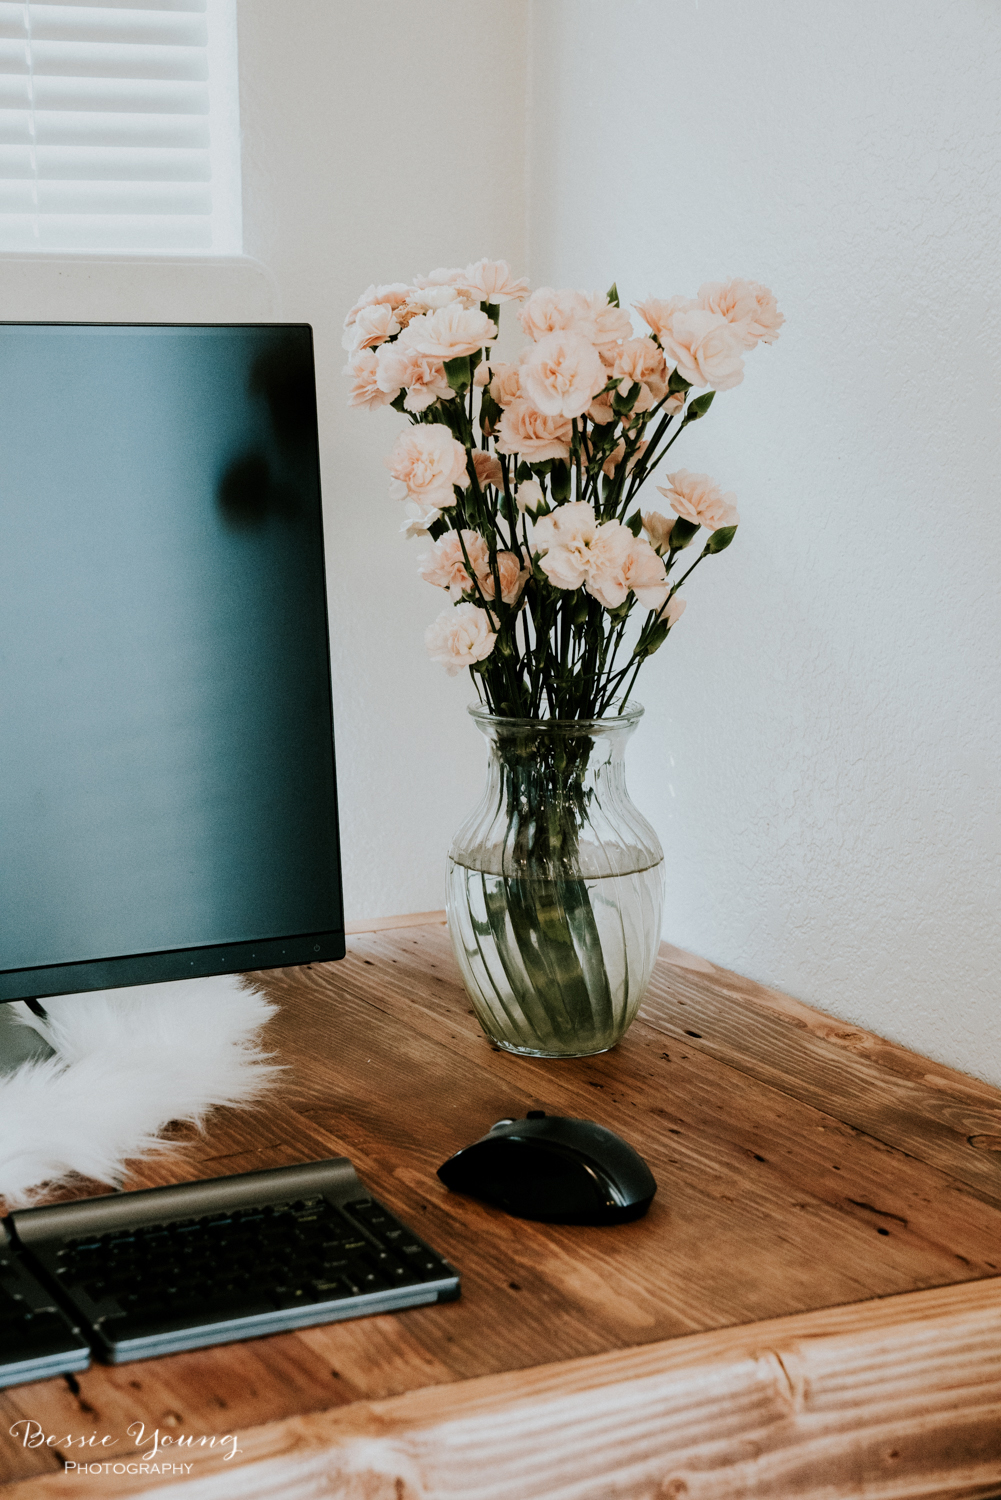
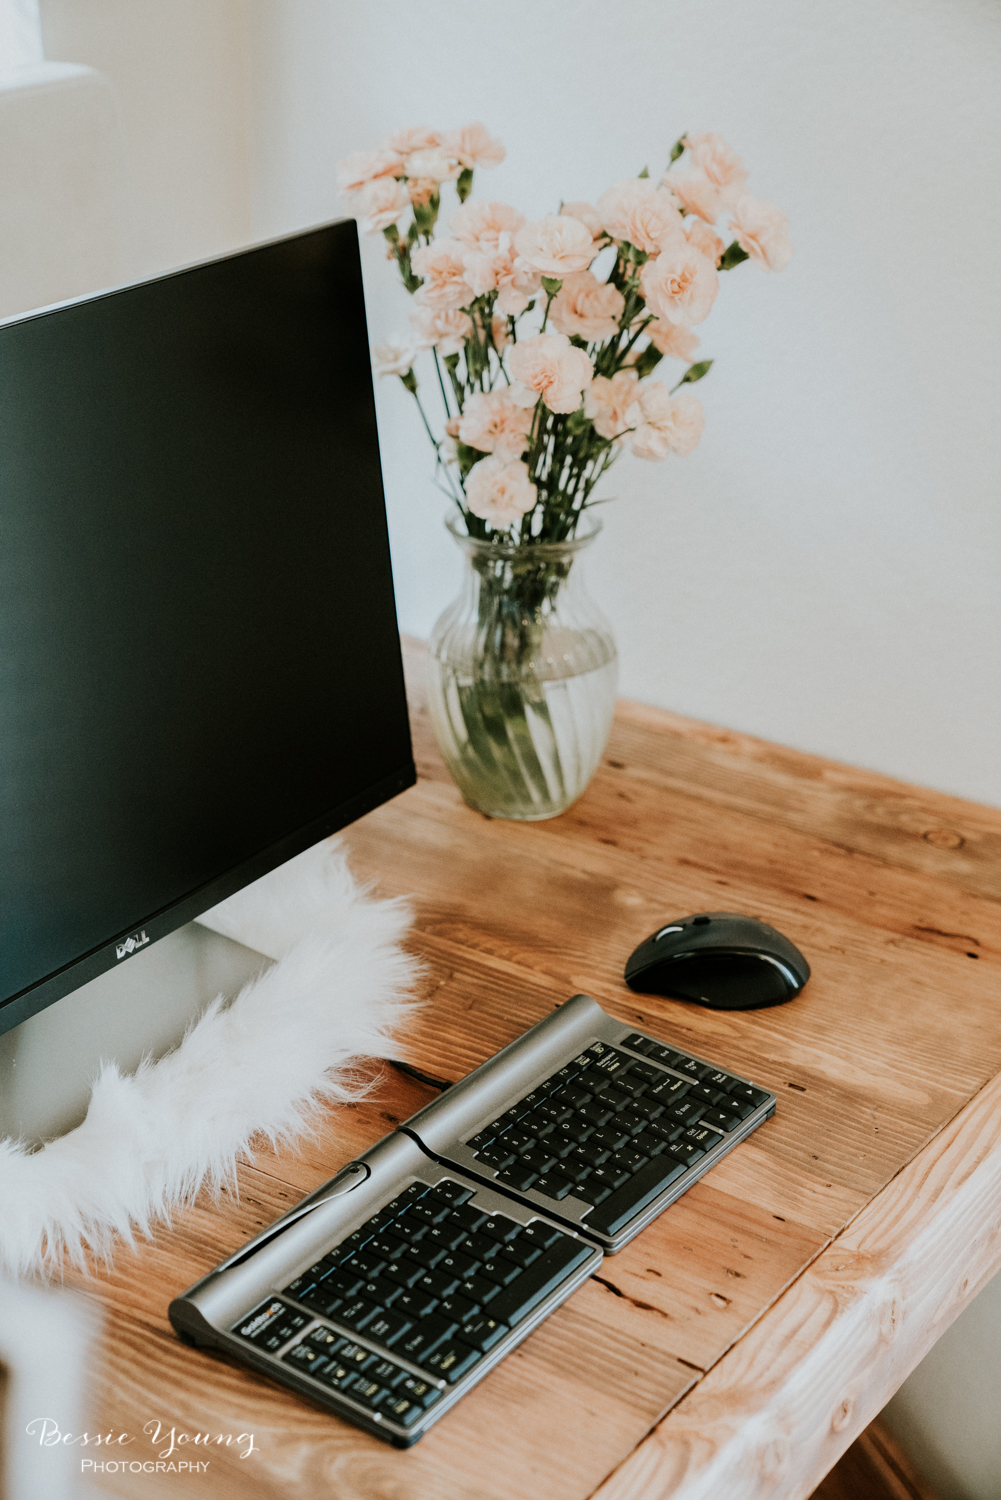
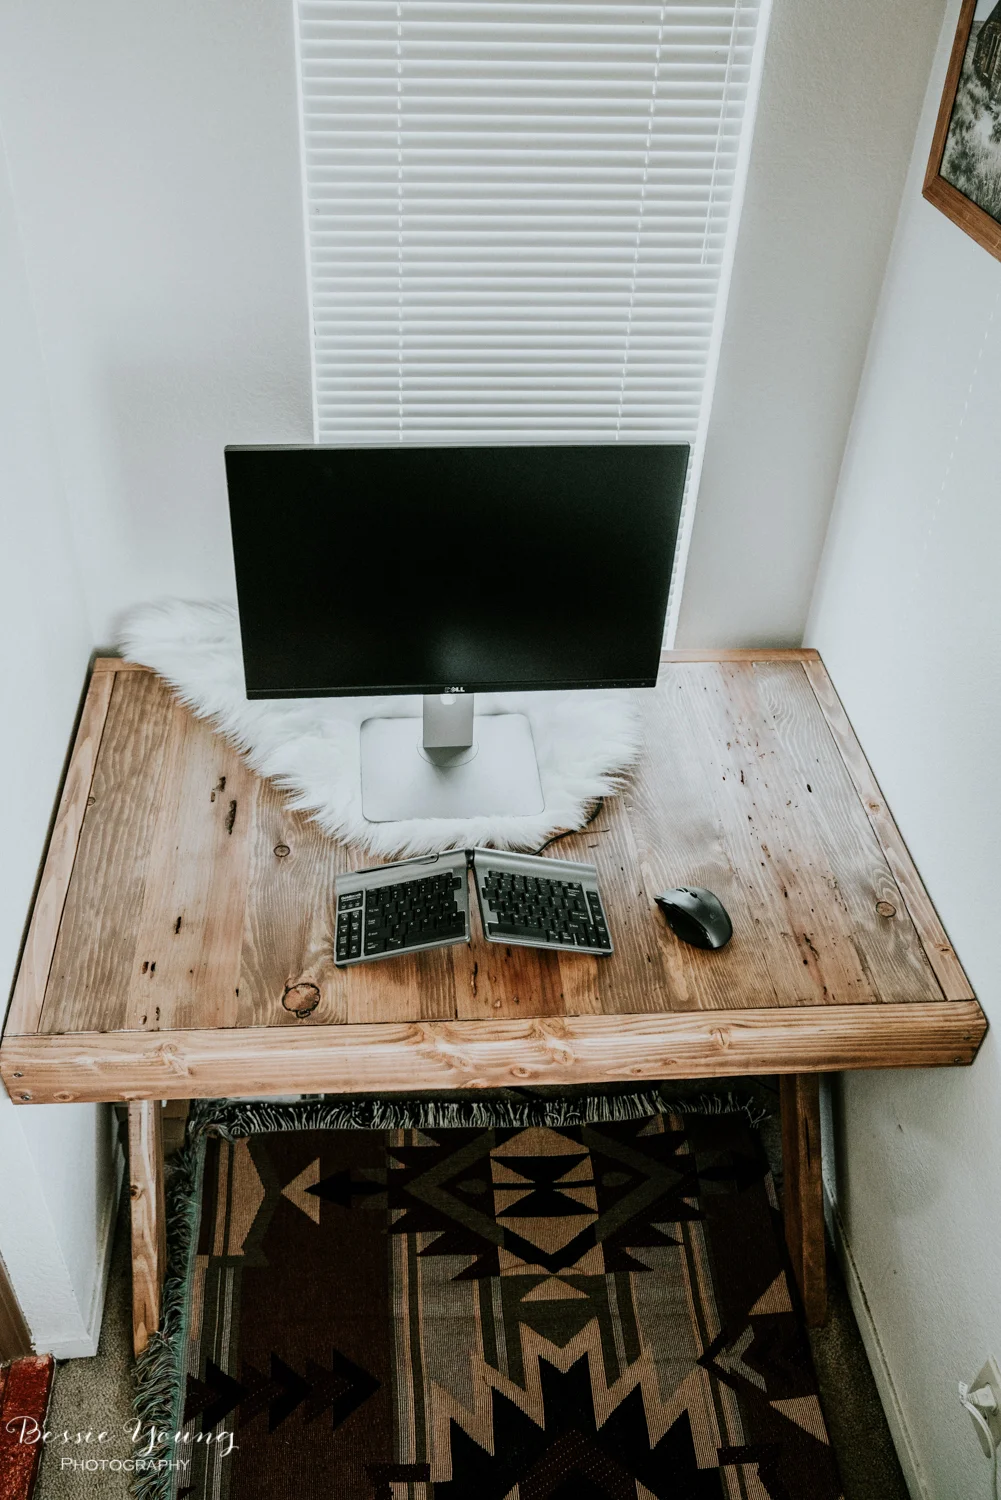
New Photography Work Space - I Made A Desk - Inspiration for Photographers
New Photography Work Space
I Made A Desk

When I first started my photography business I bought a plastic desk from Walmart. You know, one of those fold up white picnic desks. Well, I have had that desk for a few years now; however, it just wasn't doing it for me anymore. Ultimately, it wasn't very inspiring. It was bland, white, uncomfortable, and just not all that awesome. Now, it worked for the time I had it. It was a great desk and functioned just as it should. It is just that I got to a point where I needed a nice pretty desk. Something that would inspire me to be creative. Something that I wanted to sit at rather than had to sit at.
I began my search for a new desk during the Black Friday madness last yer. I thought that I could get something for somewhat reasonable. Well, let me tell you.... I was wrong. I guess I just have way too expensive of taste :? Everything seemed to be about $1,000 after taxes, shipping, etc so I began thinking that I would just make my own.
If you don't know this about me, I used to run an Etsy shop that was a rustic home decor shop. I created all sorts of fun wood things from log tables to kitchen items. I haven't ever made anything as complex as a desk, but I was up for a challenge.
When I started, all I knew is I wanted it to be rustic yet fit my current living room vibe which made shopping super easy. I went to Lowe's and Home Depot for all my supplies.
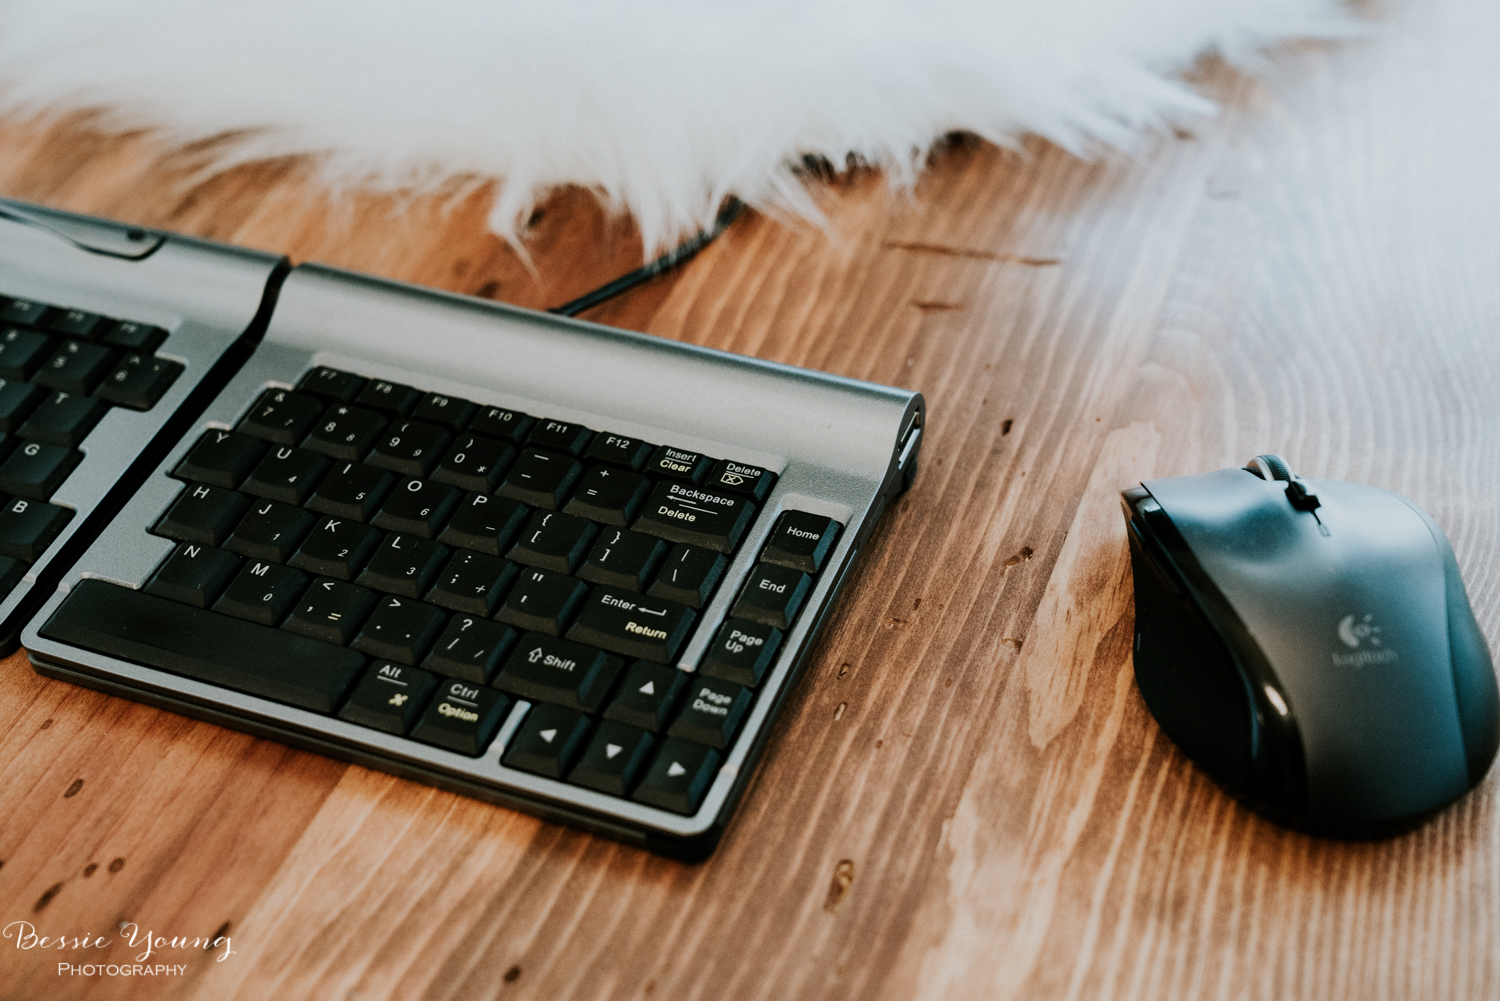
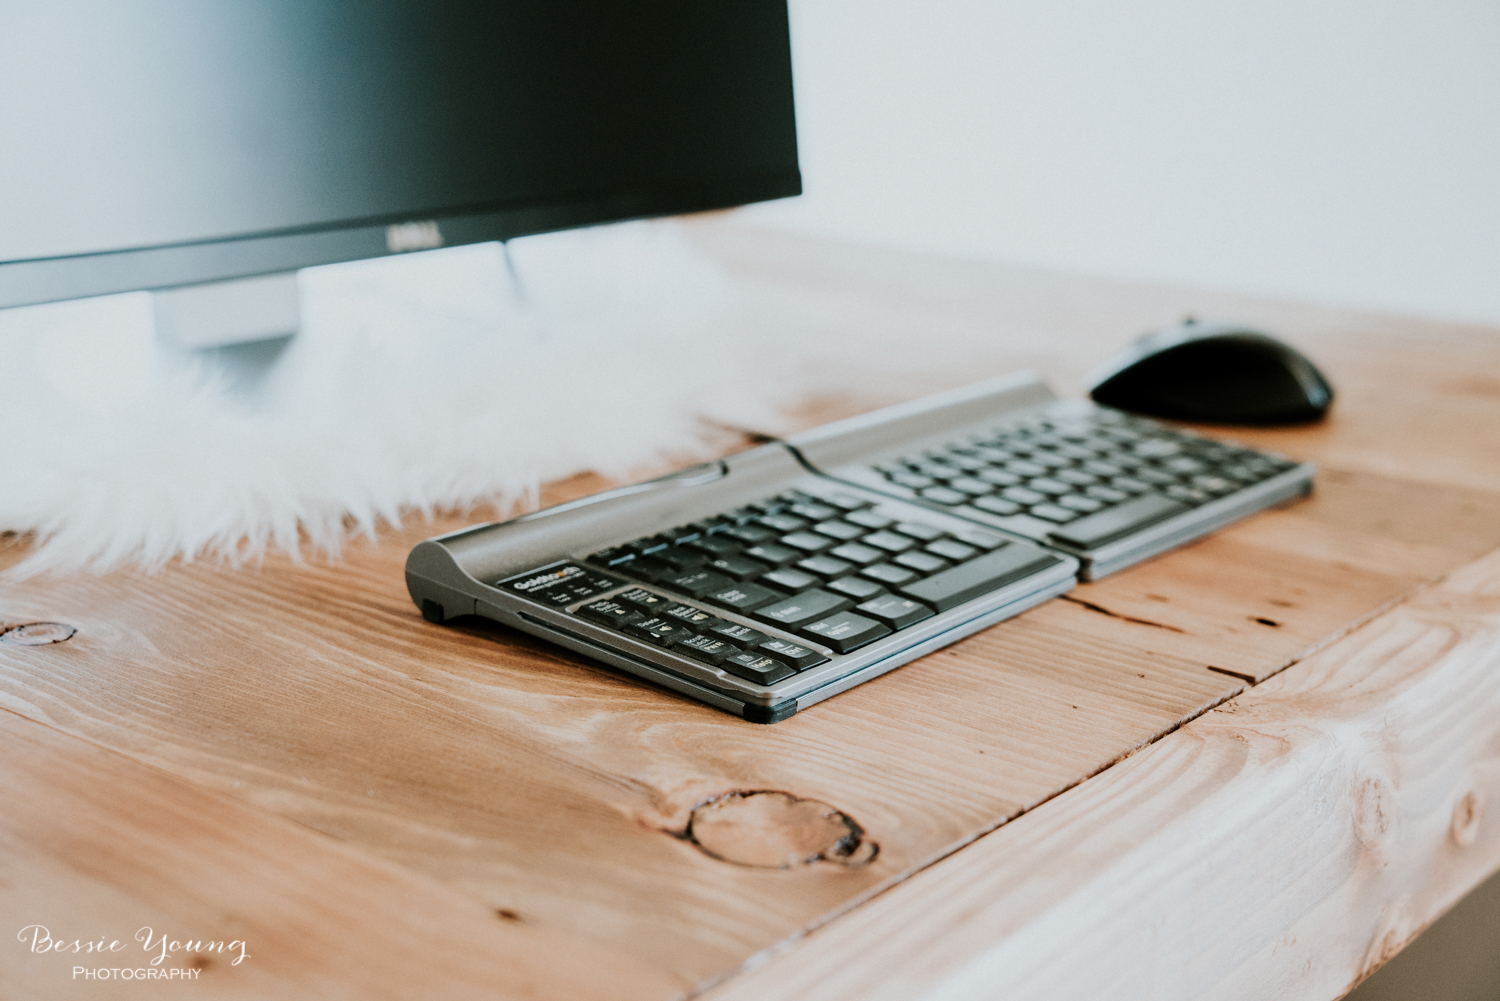
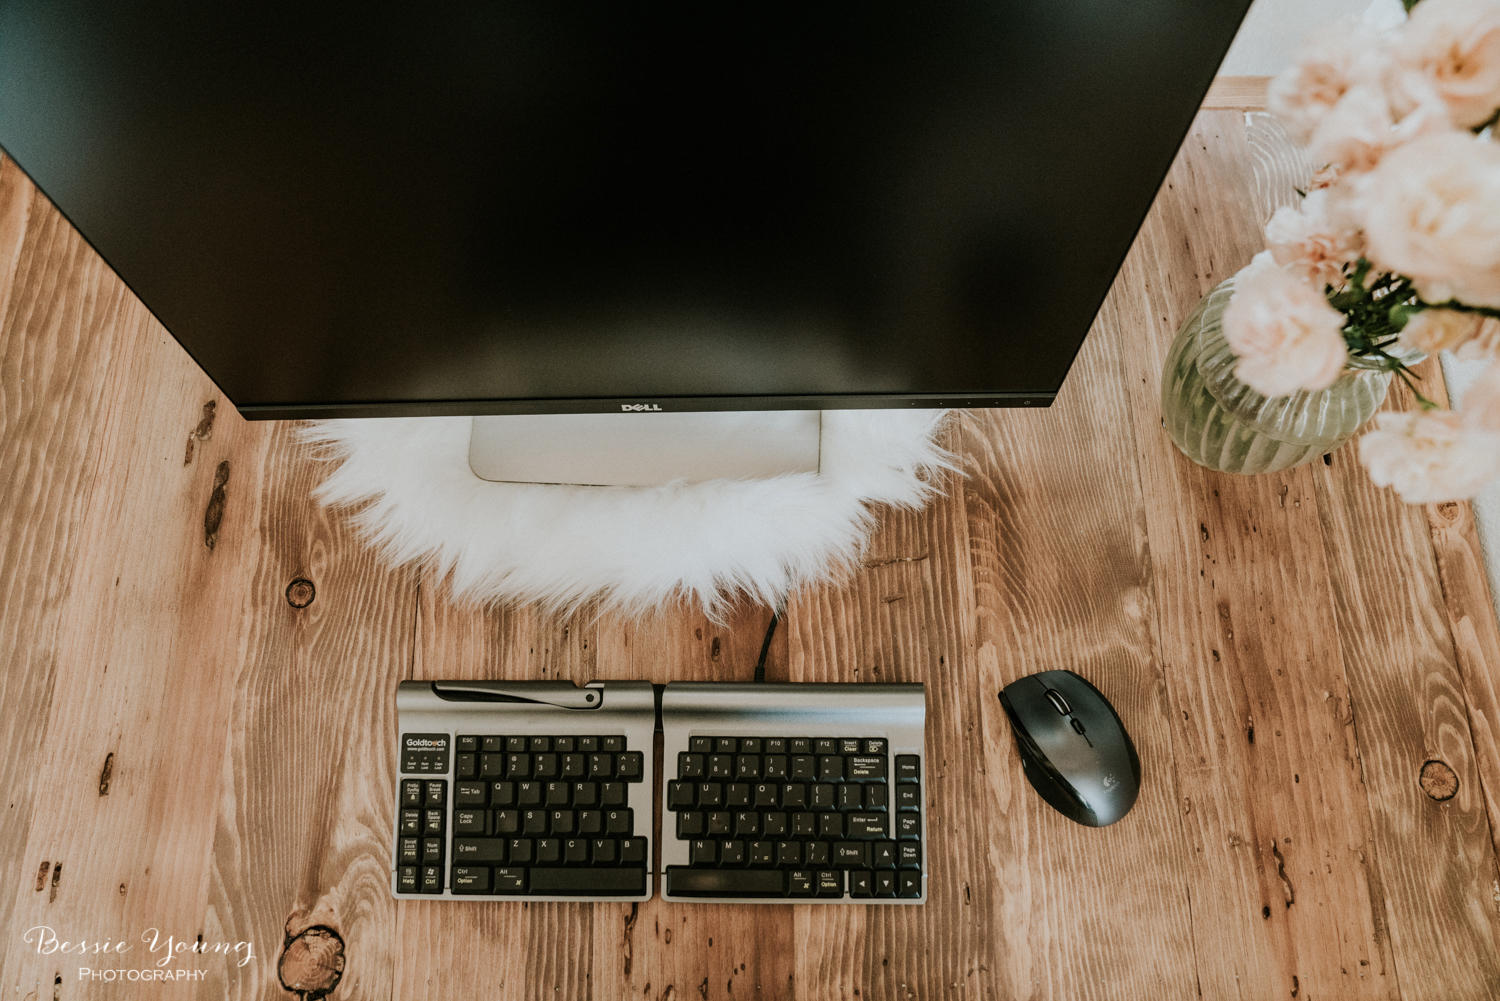
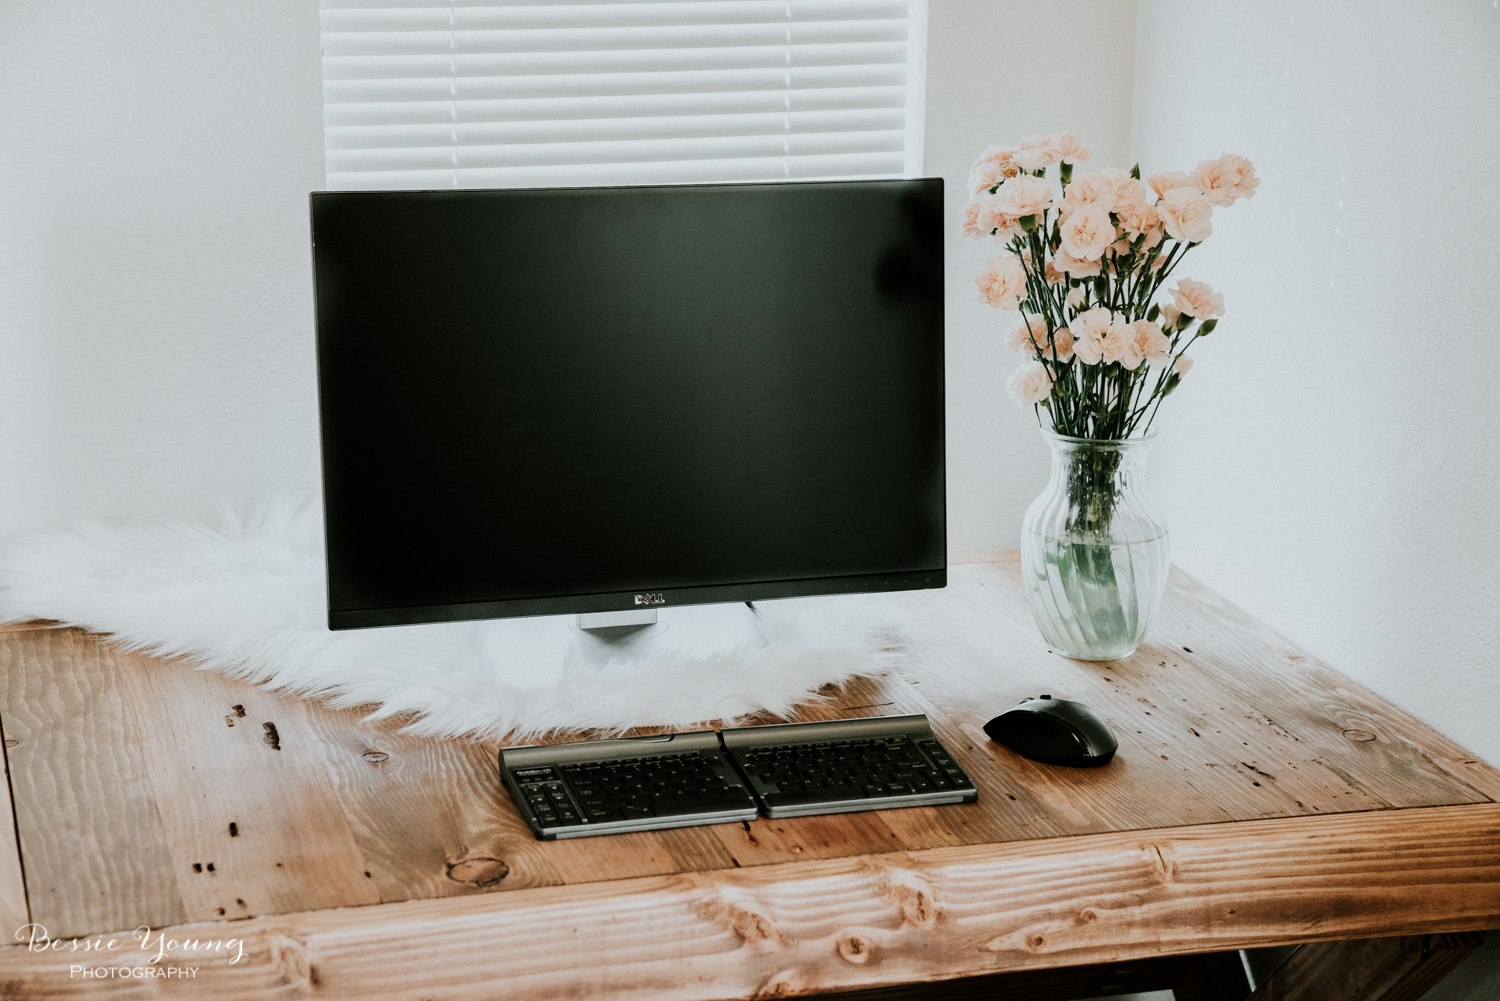
I am so incredibly excited for the way that it turned out. It took a few days to make and a few days for the stain to actually dry.
There is something to say for an inspired space. If you are a creative you completely understand. You need to be somewhere that is going to inspire you, somewhere that you are going to want to be, and somewhere that will get your creative mind going. This space is exactly that for me. As I sit at this desk, I just smile. I smile knowing that I made it, because it is beautiful, because it is exactly what I wanted, and because it just makes me happy.
Now, with this new beautiful desk, I will be able to create the Free Stock Images that you all have been asking for! Yay!
I hope you all enjoyed this blog. Leave a comment below and let me know what you think.
Wishing you a very beautiful day!
Bessie
2 Essential Apps for Landscape Photography
2 Essential Apps for Landscape Photography

Let's get real here for a minute. There are so many dang terrible Apps out there to download. The struggle is real! It seems as though there are more bad, not helpful, clunky apps than there are good ones. Now I have downloaded, played with, and unistalled more apps than I can count. I'm talking probably over 100. I have been looking and searching for helpful Apps for Landscape Photography and I have finally found 2 really awesome ones!
2 Essential Apps for Landscape Photography:
1. Photo Pills
This App is awesome! It is everything you need to schedule your landscape photography trips. It will tell you when sunset is, when sunrise is, where the galaxies are in the sky, what the moon is going to do, so on and so forth.
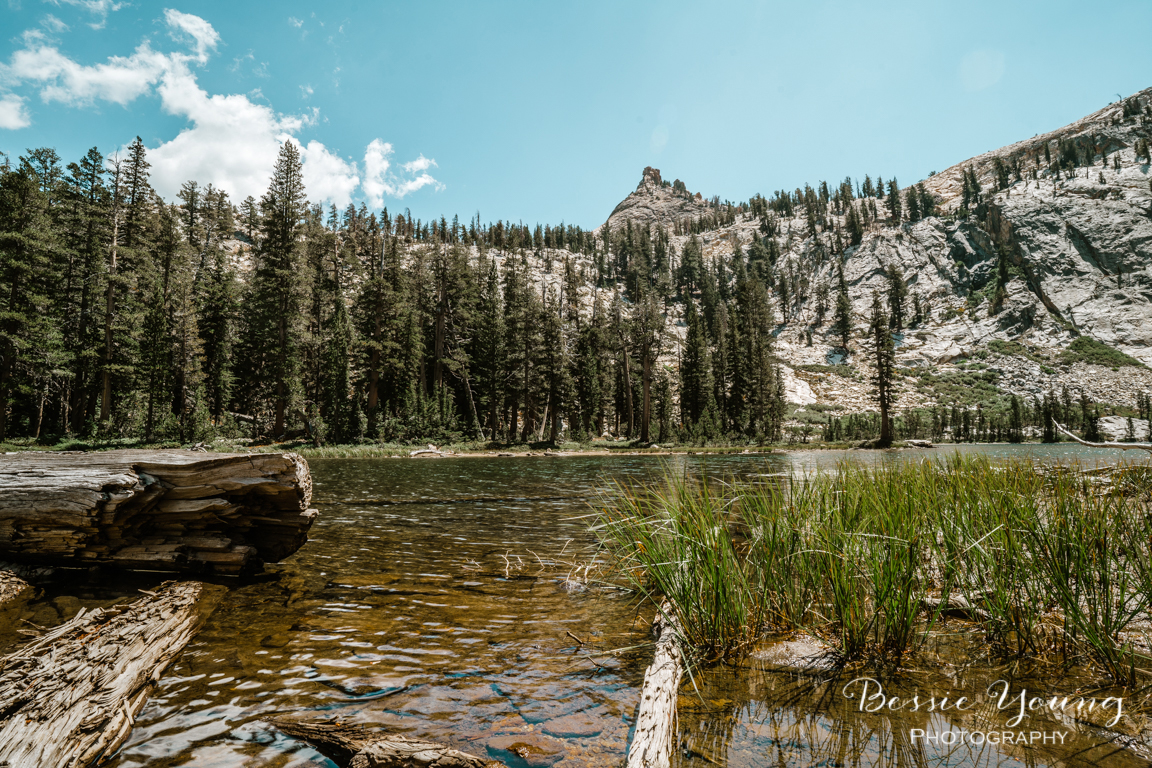
It is a one time payment of $10, but it is totally worth it. This app is what made this image possible:


2. Backcountry Navigator
This app is definitely for navigation and safety. It is always a must to be able to know where you are at any given moment. When you are out in the wilderness you never know what the wild is going to through at you. There is no reception, no internet, no nothing so you need to make sure you have all the right equipment.
Backcountry Navigator is a must! You can download quad maps, topo maps, aerial images, and so much more. This app will show you where you are and help you navigate your way to your destination, or your way to safety. I love this app. It is another app that costs $10 one time, but its necessary.
Leave a comment below and let me know what your essential go to apps are. I am always looking for awesome apps when it comes to photography and adventure.
Wishing you the best,
Bessie
p.s. like this post? Check these out:
Featured


Sony A7riii Review - 2 Things No One Tells You
Sony A7riii Review
2 Things No One Tells You
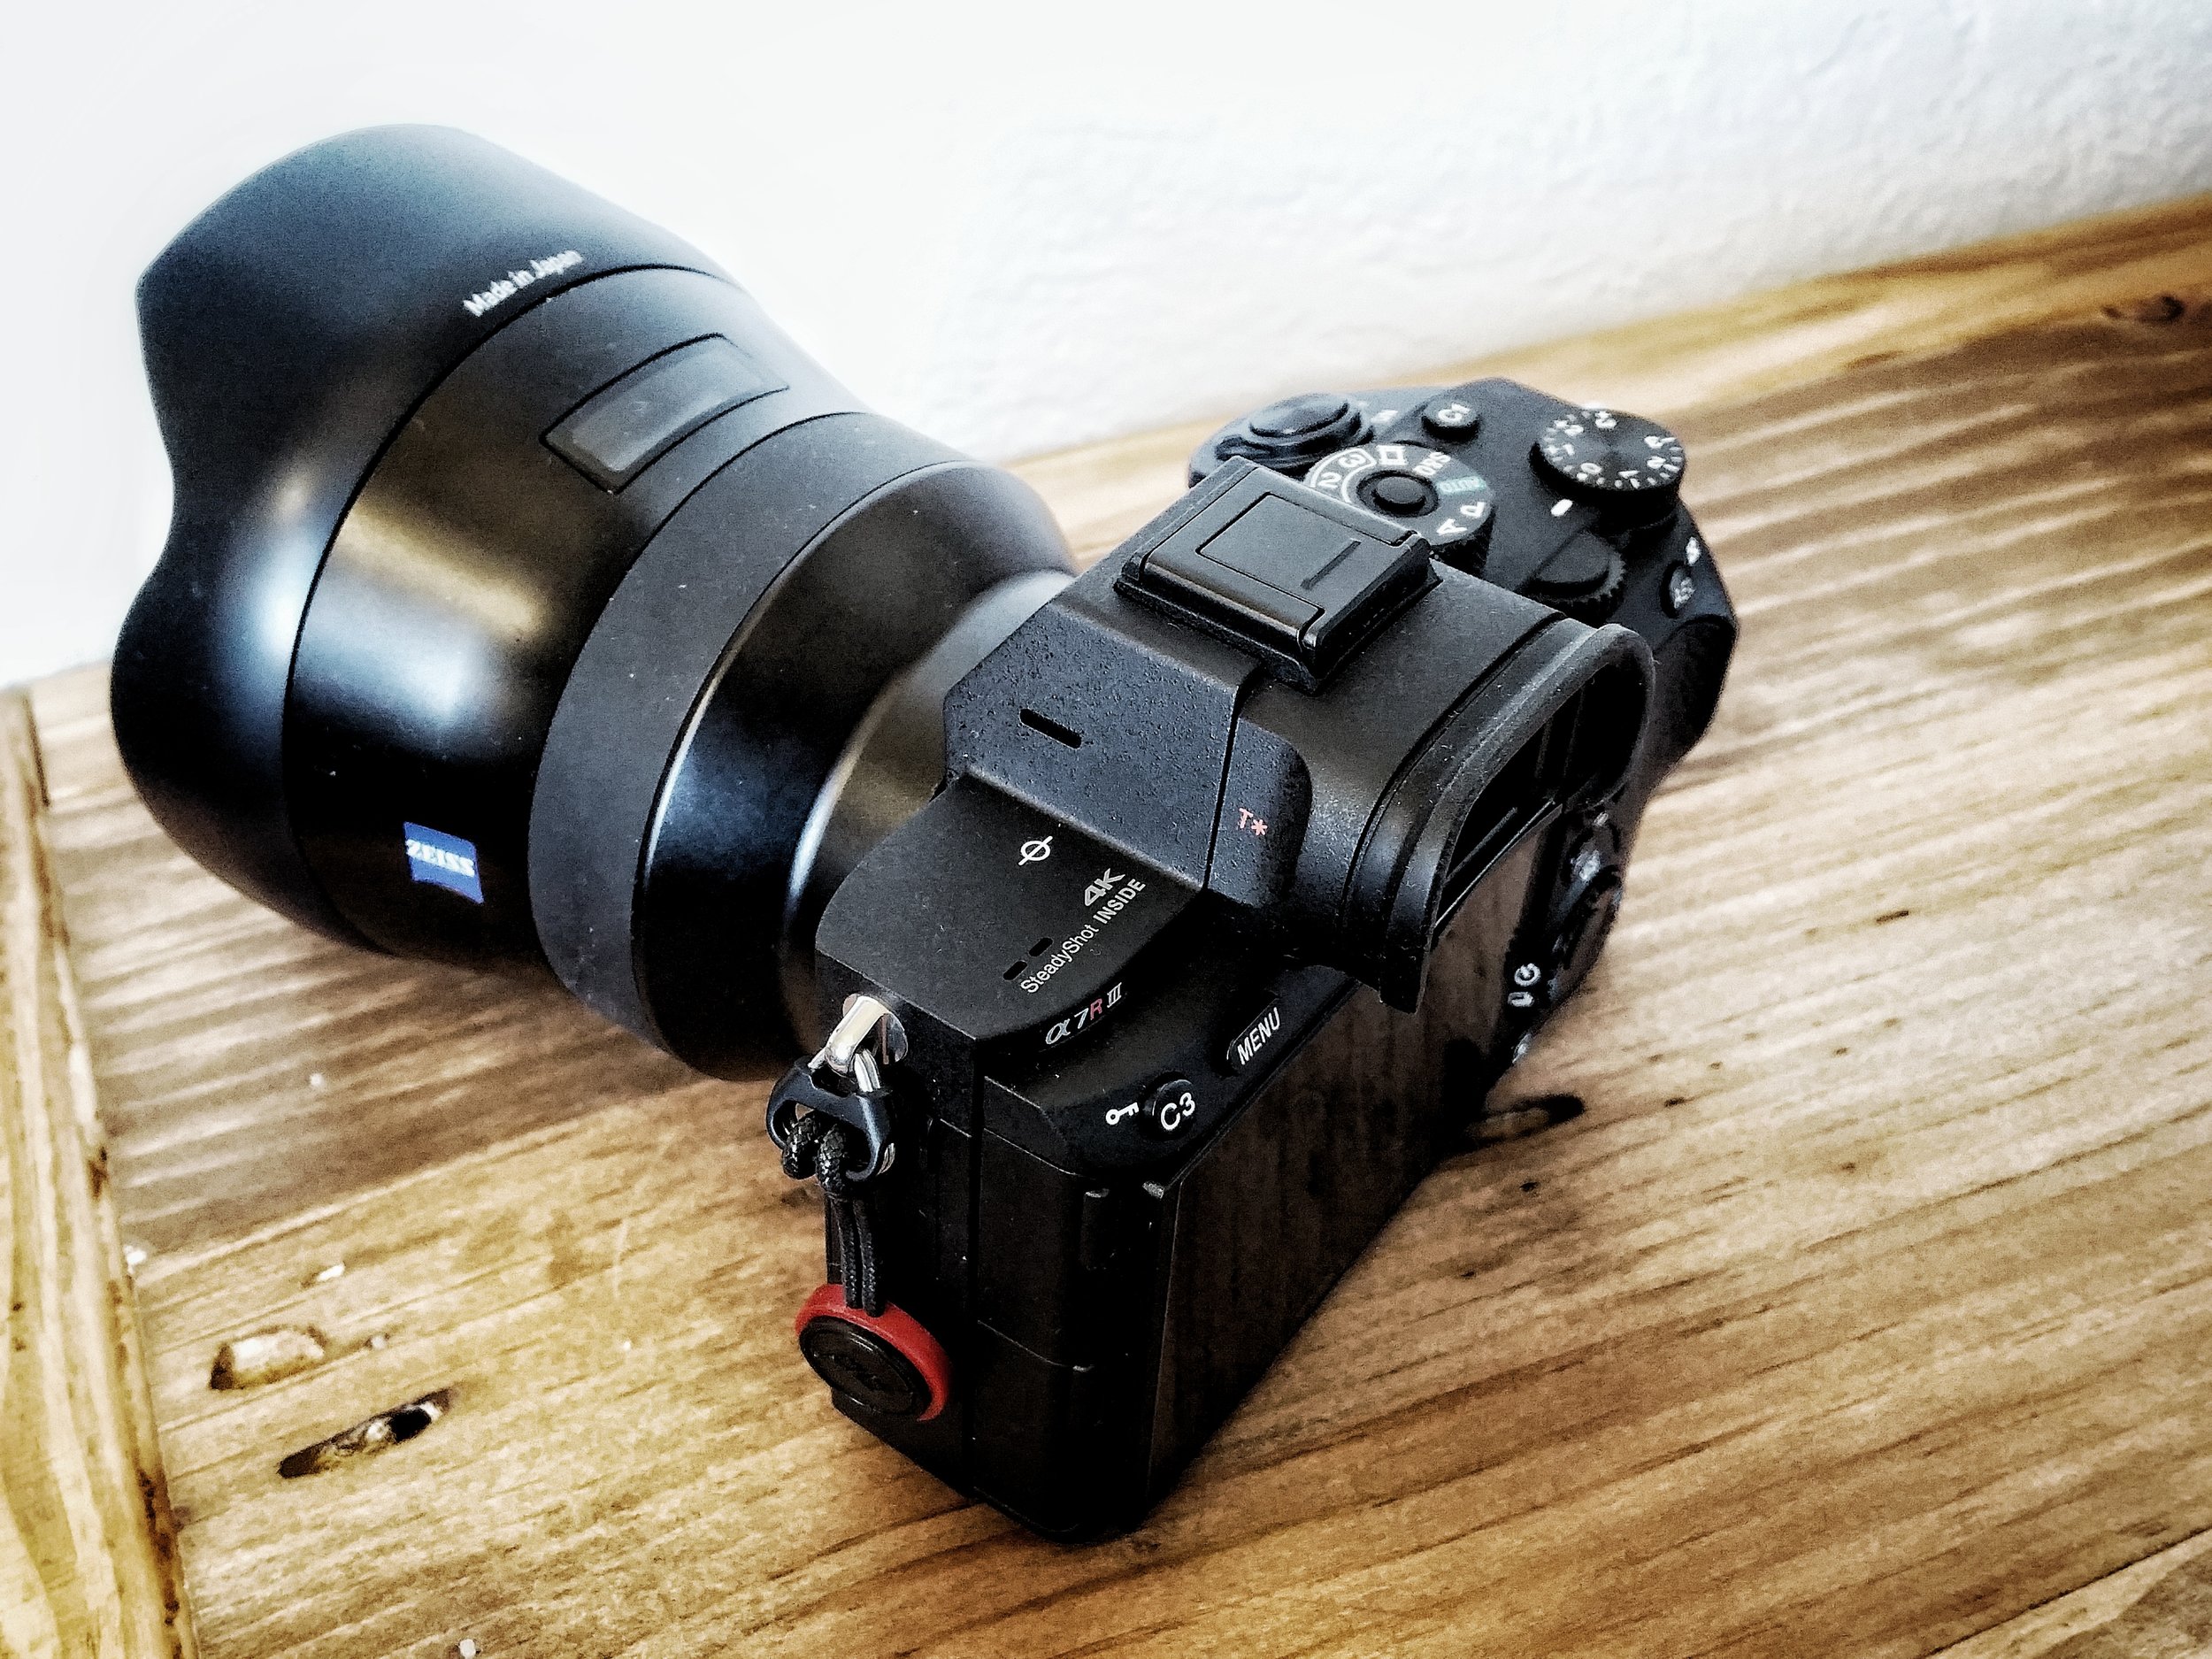


So as you all know I got the Sony A7riii. I take forever to decide on actually purchase new gear. I research it, ask around, and then research it some more. Let me tell you, I looked everywhere (or so I thought) on the internet to see if the Sony A7riii was something that was going to be a good purchase for my photography and my business.
Every site that I found had raving reviews. It has faster burst mode, longer battery life, better LCD screen, recognizes skin tone better, better continuous focus mode, so on and so forth. Everything sounded beyond amazing.
I thought I knew exactly what I was getting; however, there were 2 things that no one ever talked about. These two things were a pretty big deal in my opinion.
1. No More PlayMemories!
This is no joke. All the apps you purchased for your previous cameras, you cannot use any more.
I opened up my camera, inserted the battery, and began looking through the menu. It looked different, but that is expected since it is a new camera. As I started to change my settings and preferences the thought popped in my head 'oh I need to download my apps! How do I do that? Where is the symbol?"
The symbol was no where to be found. No Where! I thought that it must be in a different part of the menu, so I headed to trusty ole Google to see how to get my apps on my camera. Low and behold.... there is no PlayMemories App. Let me tell you, I was in disbelief. Seriously. Why would Sony decide to remove the PlayMemories? What is the purpose?
So, what I gathered is that Sony asked it's Professional Photographer users and the result was that the professionals do not use the Apps as a whole so Sony decided to remove the feature. To me this is just silly. I would think that the majority of Sony users are Amateur photographers. Wouldn't they want to cater to the majority of their customers?
For me, the two Apps that I used the most were the smart phone remote and the time laps app. Sony did create a smart phone remote feature in the menu so we are good to go there. There is also a work around for the time laps as well, so even though you don't get the goodness of the app you can at least still get a little bit of a time laps.
Now you are warned. All the apps that you purchased previously you cannot use on your new A7riii.
2. Your Desktop Lightroom Does Not Work!
This is such a big deal! Ok, so what am I talking about....
Adobe has indicated there will be no more updates for Lightroom 6. This means that Adobe will not be adding any additional camera's to the list of recognizable camera files. It just so happens that the Sony A7riii is not on the list. You read that right. So now what?
You will have to upgrade to Lightroom 7. The only way that you can upgrade to Lightroom 7 is by purchasing the Creative Cloud subscription. So now you will be renting Lightroom by the month.
Even though these two things are pretty big things, I still would have eventually purchased the Sony A7riii, but I might have had to think about it for quite a bit longer than I did.
Hopefully this article helps you with you decisions.
Wishing you nothing but the best,
Bessie
Like this post? Check out Similar ones like it:
Featured